Khans of Tarkir Limited Ratings
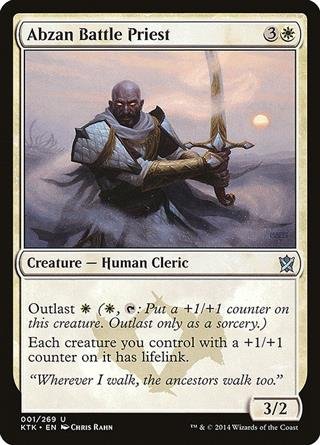
Abzan Battle Priest
AI Rating: 4Pro Rating: 3.5
This often comes down and immediately gives a creature or two Lifelink, and like all Outlast creatures if it sticks around it becomes a threat all on its own too.
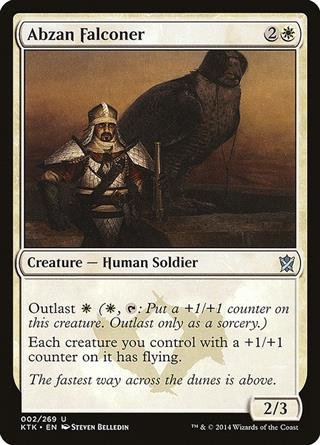
Abzan Falconer
AI Rating: 4.4Pro Rating: 3.5
If you're in White, there's a good chance this will give one or two of your creatures Flying right away, and it becomes a pretty impressive flying threat on its own if it's left unchecked.
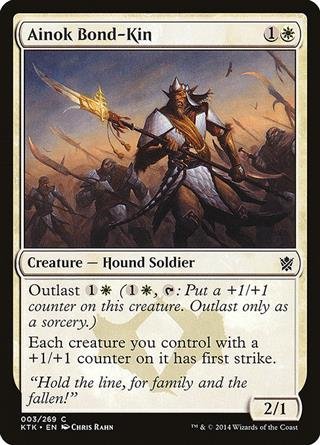
Ainok Bond-Kin
AI Rating: 4.2Pro Rating: 3
Like the other Outlast lords, this one gives you a decent baseline and is a great place to sink your mana.
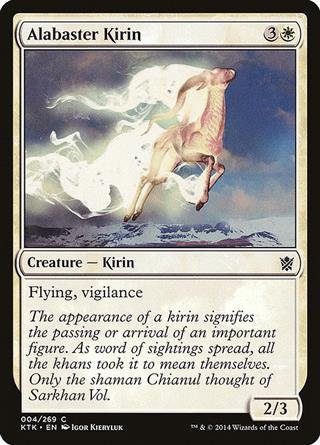
Alabaster Kirin
AI Rating: 2.6Pro Rating: 2
This has passable stats for this set, and is a great place to put +1/+1 counters.
Brave the Sands
AI Rating: 1.1Pro Rating: 0
This basically does nothing in Limited and you never want to play a card like that. Vigilance + extra block just isn't enough of a buff to be worth a card.
Dazzling Ramparts
AI Rating: 1.8Pro Rating: 1.5
This isn't a terrible defensive card, but it isn't something you're really hoping to get either. It can block, but it can't kill things, and while the tap effect is nice it is also kind of awkward on a creature you want to block with.
Defiant Strike
AI Rating: 1.9Pro Rating: 1.0 // 2.5
This is pretty awful if you don't have a bunch of Prowess in your deck. However, getting lots of Prowess is very doable, so you'll find yourself in decks where this works nicely often enough.
End Hostilities
AI Rating: 5Pro Rating: 4.5
As usual, a sweeper is a powerful thing, but it can also be awkward if you're an aggro deck. Still, this kind of power to reset the game is impossible to replace.
Erase
AI Rating: 0.8Pro Rating: 0.5
This isn't an Enchantment-heavy set, so this is sideboard material. You won't bring it in very often either.
Feat of Resistance
AI Rating: 3.8Pro Rating: 3
This is a nice trick in any set, as it has the ability to allow your creature to easily win combat and/or save it for removal. It can even make a creature unblockable in a pinch. Then, you throw in Prowess and +1/+1 counter synergies, and we're talking about an awesome Common.
Firehoof Cavalry
AI Rating: 0.7Pro Rating: 1
This is irrelevant on almost all board states. It's too small early and the ability is too expensive and risky late.
Herald of Anafenza
AI Rating: 5Pro Rating: 4.5
This is a one-drop that can take over the game by it's mid-point. Growing large and adding a 1/1 to the board every time it does is awesome. Doesn't feel that different from Pack Rat!
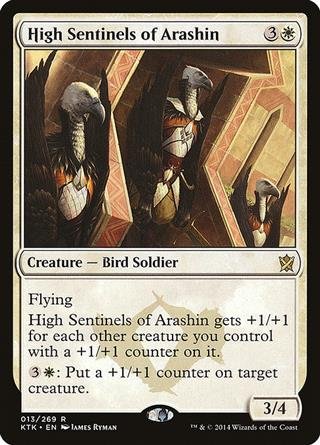
High Sentinels of Arashin
AI Rating: 5Pro Rating: 4.5
This has great starting stats and will often be much larger, especially because it can hand out +1/+1 counters in the late game.
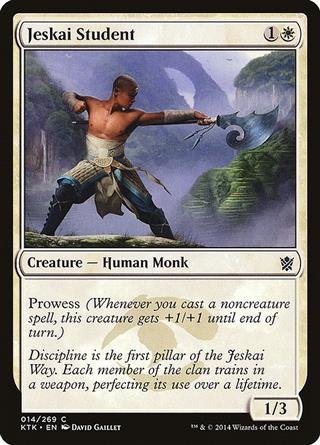
Jeskai Student
AI Rating: 2.4Pro Rating: 2.5
This stat-line performs surprisingly well in a set loaded with instant-speed ways to trigger Prowess.
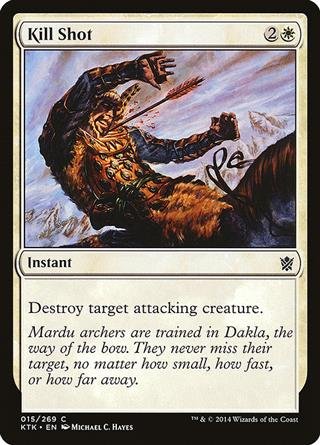
Kill Shot
AI Rating: 3.9Pro Rating: 2.5
It is far from premium, but Kill Shot does the job often enough to be a worthwhile inclusion in most White decks.

Mardu Hateblade
AI Rating: 3.1Pro Rating: 2.5
You need to be playing Black for this to do it's thing, but if you can we're talking about a cheap creature that can trade with anything.
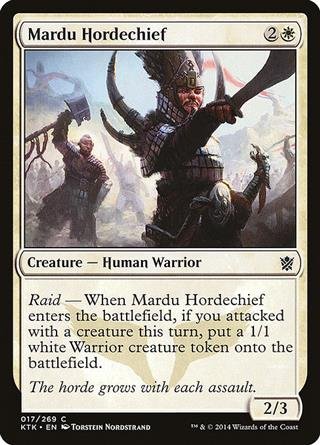
Mardu Hordechief
AI Rating: 4.2Pro Rating: 3
White decks are set up pretty well for this to be a three mana 2/3 that gives you a 1/1 pretty often, and that's a great deal.
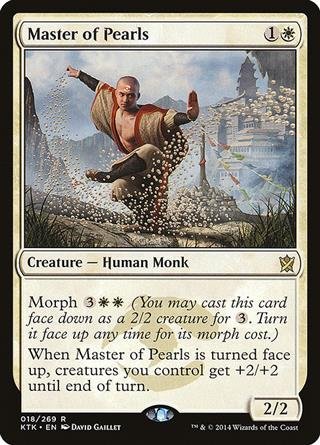
Master of Pearls
AI Rating: 5Pro Rating: 3.5
There will be times where turning the Master face-up breaks the game wide open, but if you don't already have a significant board-state the ability can be underwhelming. It has a really high ceiling and a pretty mediocre floor.
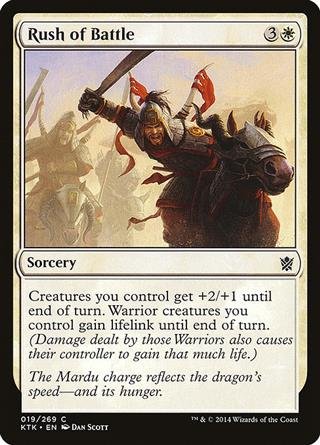
Rush of Battle
AI Rating: 2.9Pro Rating: 1
There are definitely Warriors in this set, and giving them all a reasonable buff and lifelink can sometimes help you win a race, but this demands you be good at going wide and running enough Warriors to really be worthwhile, and those things are far from guaranteed.
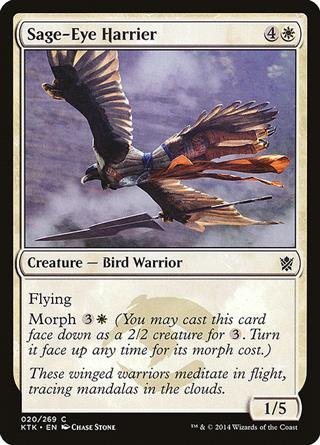
Sage-Eye Harrier
AI Rating: 2.1Pro Rating: 1.5
This has mediocre stats no matter how you play it.
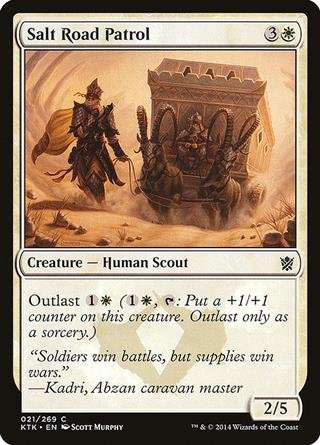
Salt Road Patrol
AI Rating: 1.9Pro Rating: 2
This has an almost passable starting stat-line, and it's ability to grow can make it ito an impressive creature if the game goes long enough.
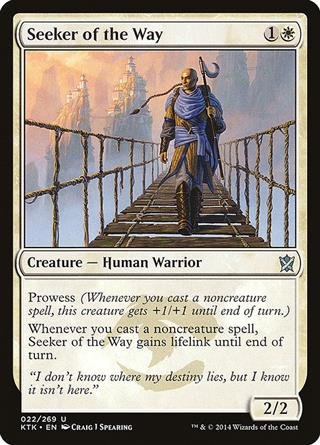
Seeker of the Way
AI Rating: 4.4Pro Rating: 4
This is an absolute beating. It's very easy to buff Prowess creatures in this format, making it a nightmare to block the Seeker. Getting lifelink to go along with the stats boost is a huge deal too.
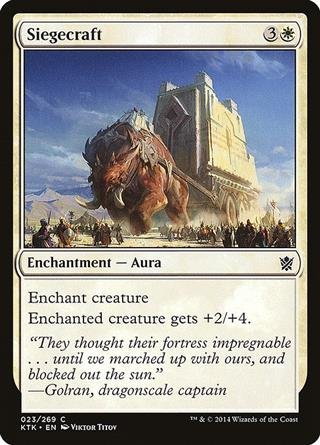
Siegecraft
AI Rating: 0.8Pro Rating: 0
This offers a mediocre stats boost and doesn't do enough to overcome the massive risk of getting 2-for-1'd.
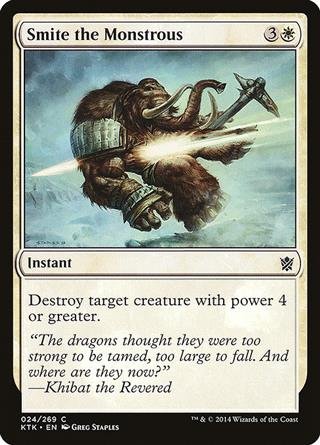
Smite the Monstrous
AI Rating: 2.6Pro Rating: 2
You can run it in your deck if you need to, but it doesn't always have a target.
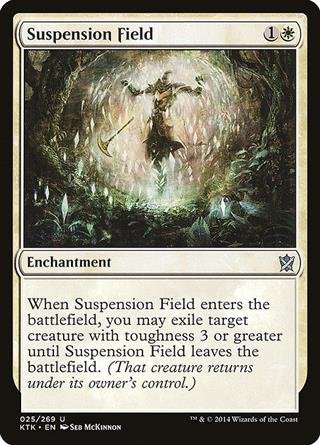
Suspension Field
AI Rating: 4.1Pro Rating: 3.5
This is a very efficient way to deal with many creatures in the format, though it is a bit of a bummer it can't deal with face-down Morphs.
Take Up Arms
AI Rating: 2.8Pro Rating: 2
This isn't the best rate for getting three 1/1 tokens, even at Instant speed. Buf if you need to go wide, it can do the job.

Timely Hordemate
AI Rating: 4.1Pro Rating: 2
This has bad stats and it's Raid is surprisingly challenging to get going. Not only do you need to attack, as with all Raid creatures, but you also need a creature in the graveyard with the right stats. It doesn't line up often enough for this to be anything special.
Venerable Lammasu
AI Rating: 0.4Pro Rating: 1
This has awful stats.
War Behemoth
AI Rating: 1.1Pro Rating: 1.5
This is really inefficient no matter how you play it.
Watcher of the Roost
AI Rating: 4Pro Rating: 3
This has passable stats and often amounts to being a three mana 2/1 flyer that gains you 2 life, and that's a nice card.
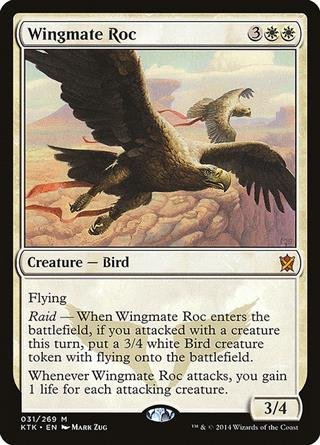
Wingmate Roc
AI Rating: 5Pro Rating: 5
One of the biggest bombs in the set. Getting the second 3/4 Flyer is very doable, so one removal spell doesn't solve the problem for your opponent. All that life can pull you back ahead from behind, too.
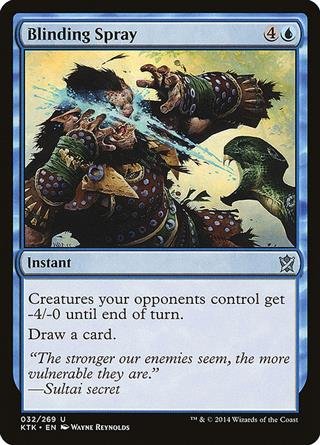
Blinding Spray
AI Rating: 1.6Pro Rating: 1.5
This is better than it looks thanks to the fact that it replaces itself and this format prominently features Prowess, but it's still basically a glorified Fog effect.
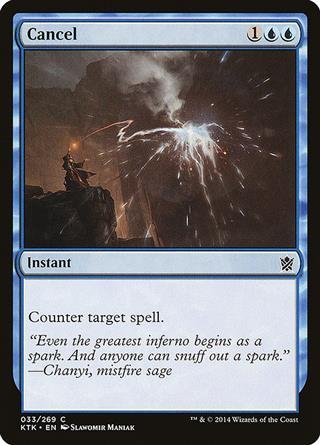
Cancel
AI Rating: 0.9Pro Rating: 1.5
As usual, this is a borderline playable.
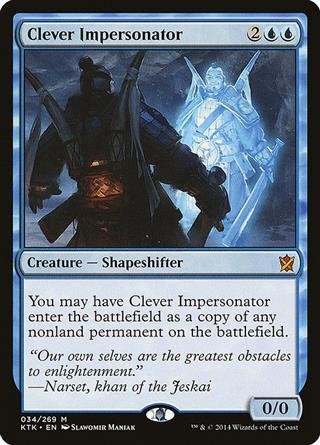
Clever Impersonator
AI Rating: 5Pro Rating: 3.5
Unlike most Clones, the Impersonator can copy any nonland permanent. You still want to copy the best creature on the board most of the time, but that upside isn't insignificant.
Crippling Chill
AI Rating: 2Pro Rating: 2.5
This card gets a big bump because of Prowess. Tapping down your opponent's best blocker and buffing two or three creatures while also getting a card feels pretty insane.
Dig Through Time
AI Rating: 4.6Pro Rating: 3.5
This can be a little bit slow, but you can definitely get your graveyard going in this format, and drawing the two best cards from your top seven for only two mana is a pretty big deal.
Disdainful Stroke
AI Rating: 1.5Pro Rating: 0.5
This is worse in this format than in most because of Morph. You'll have even less targets than usual. Leave it in your sideboard.
Dragon's Eye Savants
AI Rating: 3Pro Rating: 1.5
Seeing your opponent's hand just isn't much of an effect, and neither a three mana 2/2 nor a two mana 0/6 is something you're excited about.
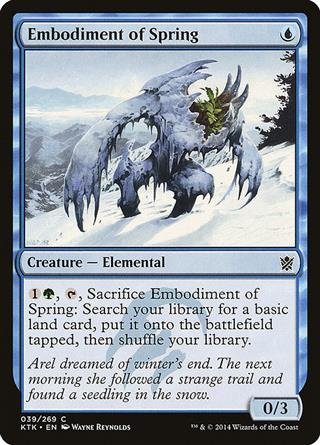
Embodiment of Spring
AI Rating: 3Pro Rating: 2
If you need fixing this does a pretty good job.
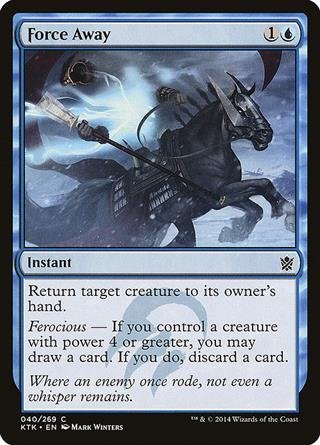
Force Away
AI Rating: 3.2Pro Rating: 2.5
This is decent without Ferocious, but if you can take the loot on to it you're going to feel really happy.
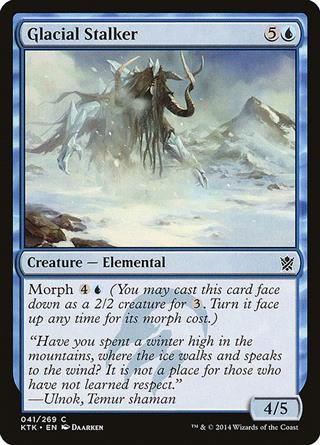
Glacial Stalker
AI Rating: 2.3Pro Rating: 2
This is better than it looks. Neither side is efficient, but once your Morph creatures get this beefy, there's a lot that can go wrong for your opponent in combat.
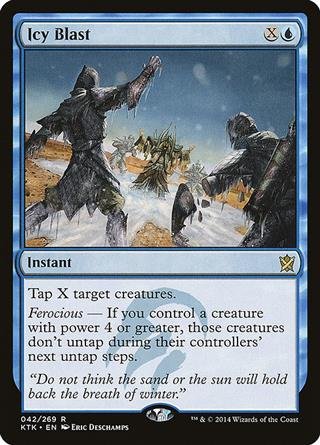
Icy Blast
AI Rating: 4.7Pro Rating: 2.5
If you can't get Ferocious going this is pretty much unplayable. If you can get Ferocious, this can shift the game wildly in your favor. But even then, you need a board state to really take advantage.
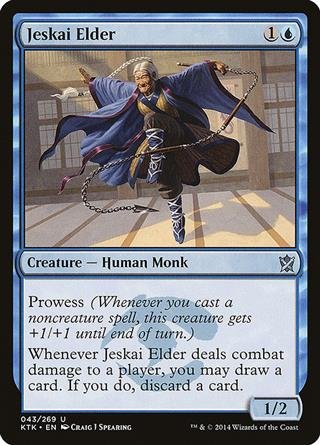
Jeskai Elder
AI Rating: 3.8Pro Rating: 2.5
Like most Prowess creatures in the set, this is better than it looks. It's tough to block because you can buff it so much at instant speed, and you get a pretty nice trigger when it hits the opponent, so that's some pretty great tension in your favor.
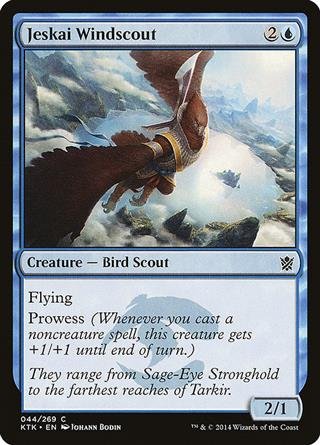
Jeskai Windscout
AI Rating: 3.3Pro Rating: 3
This is one of Blue's best Commons. It has passable base stats and Prowess means it's going to be hard to block and hit hard.
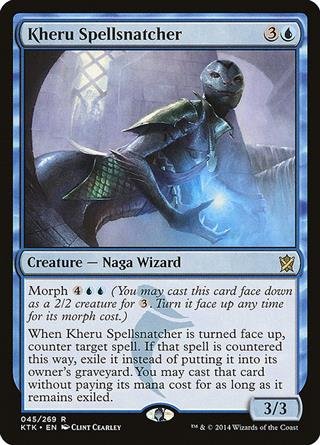
Kheru Spellsnatcher
AI Rating: 5Pro Rating: 3
If you can Morph this the effect is completely insane, as it counters a spell and steals it. That means you're always getting a 2-for-1. The downside is that you have to leave a ton of mana up and hope your opponent plays into it.
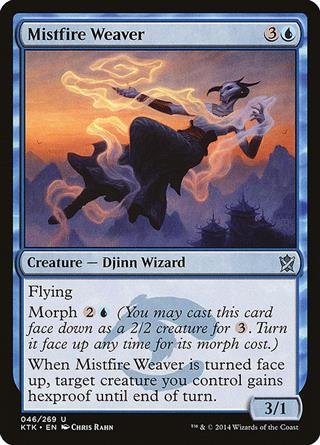
Mistfire Weaver
AI Rating: 4.2Pro Rating: 3
Granting Hexproof at instant speed can really mess things up for your opponent, and this Flyer hits pretty hard even when you cast it normally.
Monastery Flock
AI Rating: 1.6Pro Rating: 2
This is incredibly cheap to Morph, so playing it face down as a 2/2 when that's more useful is nice upside to have on your mediocre Defender.
Mystic of the Hidden Way
AI Rating: 2.6Pro Rating: 2.5
The low toughness here is pretty brutal because of the amount of mana you spend, but it's also a very real win condition when left unchecked.

Pearl Lake Ancient
AI Rating: -0Pro Rating: 5
This is huge, has the ability to get bigger, can Flash in and ambush most creatures in the format, and it's uncounterable and hard to kill. It will take over the game most of the time when you play it.
Quiet Contemplation
AI Rating: -0Pro Rating: 0
This doesn't do enough to be a worthwhile payoff for Prowess decks.
Riverwheel Aerialists
AI Rating: 3.8Pro Rating: 2.5
This is a decent finisher for Prowess decks. The stat-line was better back in 2014, and it's very rarely only a 4/5 anyway.
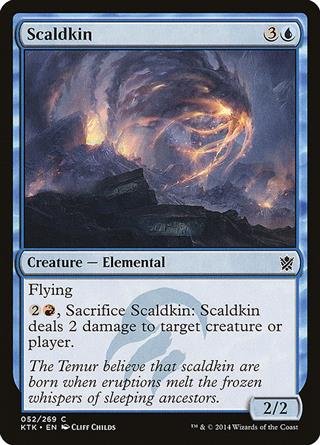
Scaldkin
AI Rating: 1.5Pro Rating: 2
This is expensive for the stat-line, and the activated ability isn't cheap either. But, we're still talking about a Flyer that can turn into removal when you need it to.
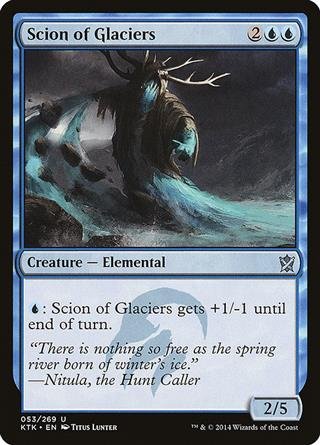
Scion of Glaciers
AI Rating: 3.6Pro Rating: 2
The ability to raise it's power makes it both a formidable attacker and blocker.
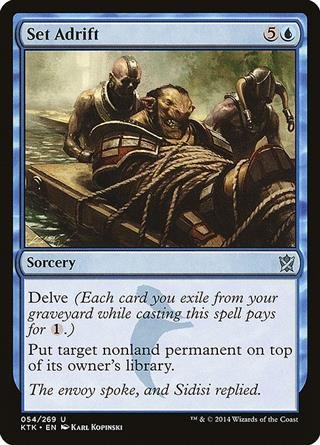
Set Adrift
AI Rating: 2.7Pro Rating: 3
It isn't very hard to make this a lot cheaper with Delve, and making your removal cheap always feels great.
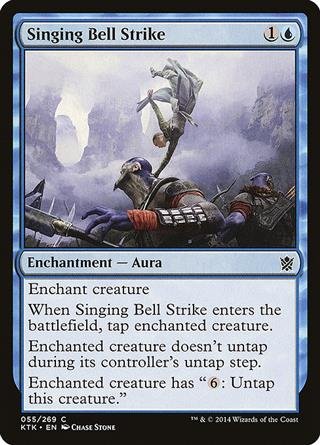
Singing Bell Strike
AI Rating: 1.5Pro Rating: 2
In the early game it can feel pretty good, especially alongside Prowess, but later in the game it's pretty close to being a blank card. So, you better win fast if you're playing this.
Stubborn Denial
AI Rating: 1.4Pro Rating: 0.5
This is definitely sideboard material. You need your opponent to have enough targets to counter and you need to be able to get Ferocioius going for it to be worth it.
Taigam's Scheming
AI Rating: 0.4Pro Rating: 0
Loading the graveyard is important in Blue, but not so important that you want to play Taigam's Scheming. It makes you go down a card and you don't get anything back for it. There are better ways to load your graveyard.
Thousand Winds
AI Rating: 4.6Pro Rating: 5
This is a huge Flyer that can end the game in a hurry, and if you play it face down first, it's mass bounce effect makes it even easier for you to dominate the game.
Treasure Cruise
AI Rating: 3.3Pro Rating: 3.5
It isn't quite as broken here as it is in 60-card formats, because you can't load your graveyard quite as quickly -- but you definitely can get this to the point where you are paying a tiny amount of mana to draw 3. You want one in most Blue decks, but not more than one.
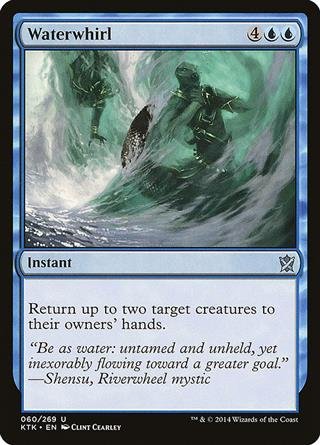
Waterwhirl
AI Rating: 2.4Pro Rating: 1
This is expensive enough that it's hard or you to get a tempo advantage, and most of the time you go down a card for the effect.
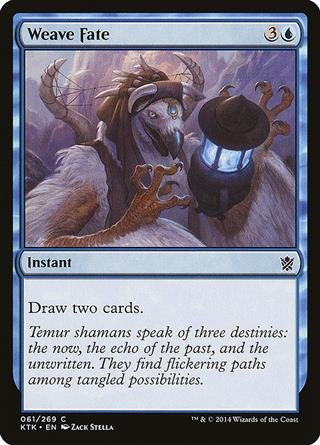
Weave Fate
AI Rating: 1.7Pro Rating: 2
This is worth it in Prowess decks. That's a little less true in the other Blue decks, though.
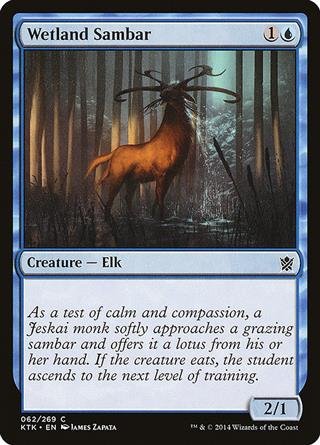
Wetland Sambar
AI Rating: 1Pro Rating: 1.5
These days this would be a 0.0, but back in 2014 passable vanillas are cards you begrudgingly played a lot more often since fewer cards were playable in general.

Whirlwind Adept
AI Rating: 1.7Pro Rating: 2.5
Hexproof can make this card into a nightmare for your opponent, especially if you find ways to buff it -- like Auras or +1/+1 counters. It also has the 4 power that Ferocious decks want.
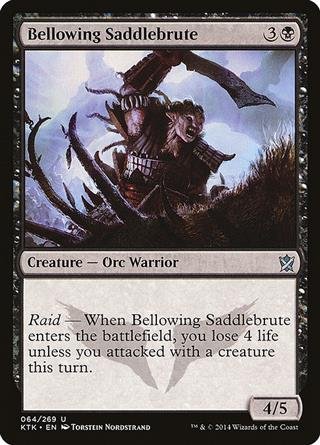
Bellowing Saddlebrute
AI Rating: 3.8Pro Rating: 2.5
This is an impressive stat-line in this set, and the warrior creature line carries some weight too. Triggering Raid is very doable.
Bitter Revelation
AI Rating: 1.9Pro Rating: 2
This lets you see a ton of cards, and loads your graveyard. It's a bit clunky, but many black decks do well with the first copy.
Bloodsoaked Champion
AI Rating: 5Pro Rating: 2
A 2/1 who can' t block doesn't stay relevant for very long, even if it can continuously come back from the graveyard. It gets better if you have some sacrifice outlets.
Dead Drop
AI Rating: 3.7Pro Rating: 2
Sometimes this can really devastate your opponent because they only have two creatures, most of the time…not so much. Even with Delve casting this whenever you want is pretty tricky.
Debilitating Injury
AI Rating: 4Pro Rating: 3
This kills a wide swath of creatures in the format, including face-down morphs.
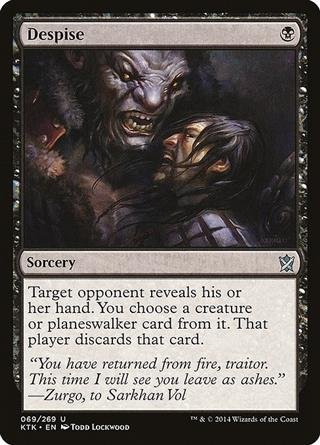
Despise
AI Rating: 1.7Pro Rating: 1.5
This is decent disruption, but it has the usual downside this type of card has: it doesn't do much when you draw it late.
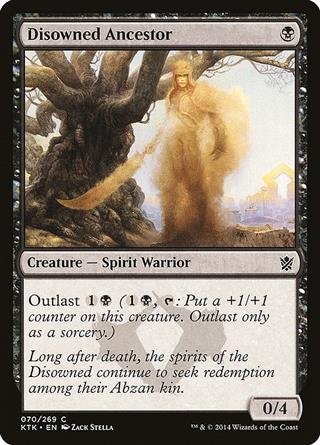
Disowned Ancestor
AI Rating: 2Pro Rating: 2.5
This having high toughness is pretty nice in a format with a toughness-matters archetype, and it's toughness can get high in a hurry.
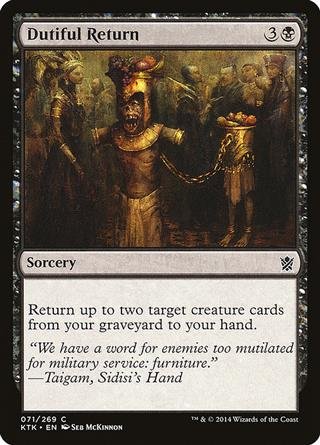
Dutiful Return
AI Rating: 1.4Pro Rating: 2
This is clunky for sure, but as usual having one of this type of effect tends to feel good in the late game. It does get worse if you're planning on delving a lot.
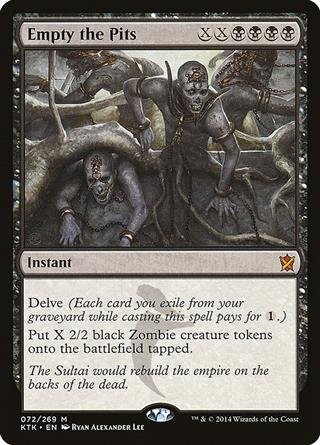
Empty the Pits
AI Rating: 3.9Pro Rating: 3
This has a really high ceiling, but even with Delve it isn't that easy to make a massive Zombie army with it. The fact that they enter tapped is a huge problem too, but at least it's an Instant.

Grim Haruspex
AI Rating: 4.8Pro Rating: 3
This doesn't count itself with the ability, but it still presents a problem for your opponent since all of your trades become 2-for-1s. Morph even means you can surprise them with the effect sometimes.
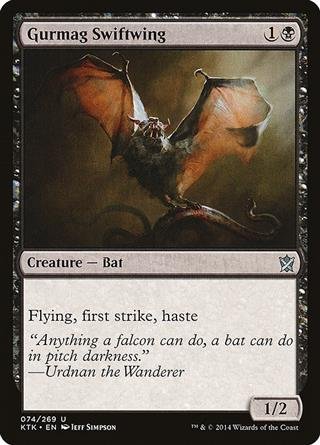
Gurmag Swiftwing
AI Rating: 3Pro Rating: 2
This is a nice place to put counters or other buffs if you have them. It quickly becomes outclassed if you don't, though.

Kheru Bloodsucker
AI Rating: 2.6Pro Rating: 2
This is a decent high toughness pay-off, but it's bad stat-line and expensive activated ability keep it from being anything ultra impressive.
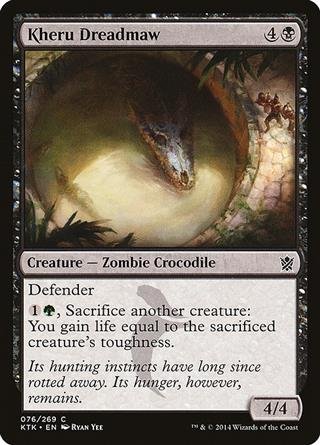
Kheru Dreadmaw
AI Rating: 0.4Pro Rating: 1
This has bad stats, especially for a Defender, and the ability is underwhelming.
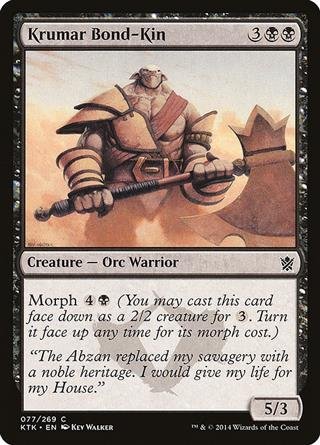
Krumar Bond-Kin
AI Rating: 1.9Pro Rating: 1.5
This never feels great, but sometimes morphing it can result in hitting your opponent harder than they expect, or even taking down a blocker and surviving.
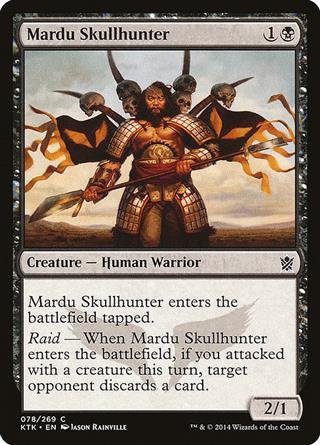
Mardu Skullhunter
AI Rating: 3.8Pro Rating: 3
If you can consistently get your opponent to discard when this enters, it feels great. If you can't, it's kind of a liability. The good news is, it's easy enough to get the discard for this to be a very nice common.
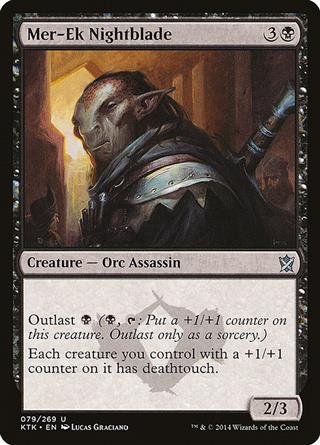
Mer-Ek Nightblade
AI Rating: 4Pro Rating: 3.5
This often comes down and gives other creatures you control death touch right away, and even when it doesn't it can buff itself very efficiently.
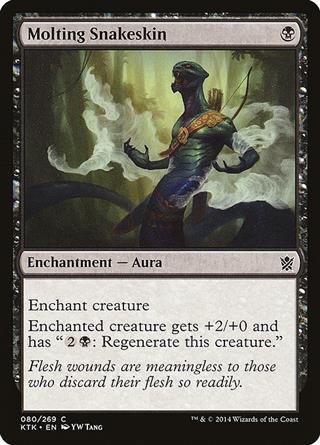
Molting Snakeskin
AI Rating: 1Pro Rating: 1
This Aura doesn't offer enough of a boost to really be worth the risk of getting 2-for-1'd. Regenaration helps with that a little bit, but three mana is a ton to have to leave up.
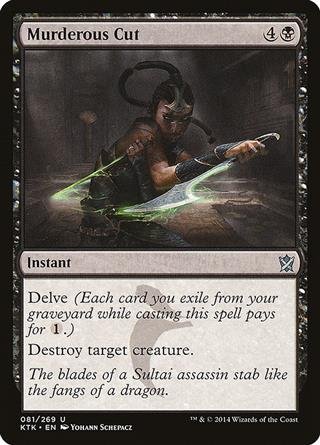
Murderous Cut
AI Rating: 4.5Pro Rating: 4
This often feels like it only costs a single Black mana, and it would be premium removal if it always cost 4.
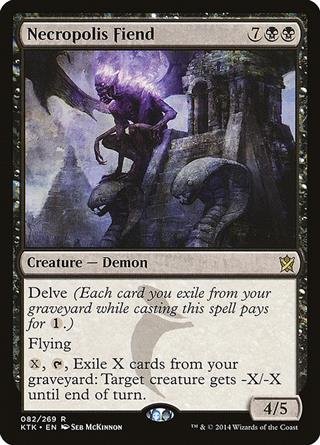
Necropolis Fiend
AI Rating: 5Pro Rating: 3.5
This card has some awkward tension. To cast it you have to exile stuff, but then it wants to exile even MORE stuff for it's activated ability. It's still a big flyer you can play efficiently, and one with upside, but it's sometimes hard to really get it going.
Raiders' Spoils
AI Rating: 3.6Pro Rating: 1.5
The stats boost is not worth 4 mana, and even though this set has Warriors in Black, most decks don't have enough of them for this to draw you cards consistently enough.
Rakshasa's Secret
AI Rating: 2Pro Rating: 1.5
This is better than most Mind Rots, mostly because most Black decks are pretty happy to also put three cards into their graveyard.
Retribution of the Ancients
AI Rating: -0Pro Rating: 1.5
Even with Outlast as a big mechanic in this set, it's challenging to get enough +1/+1 counters going for this to actually do anything worthwhile.
Rite of the Serpent
AI Rating: 1.8Pro Rating: 2
It's expensive, but it answers everything and might even give you a Snake.
Rotting Mastodon
AI Rating: 1.2Pro Rating: 1.5
High toughness matters in Black in this format, so this makes the cut on occasion.
Ruthless Ripper
AI Rating: 4.1Pro Rating: 3.5
If you always cast this face up it's already a solid card that always makes the cut, but the fact you can play it face down and turn your death toucher face up for no mana at all makes it evne easier for you to set up advantageous trades. And you even get to lower your opponent's life!
Shambling Attendants
AI Rating: 1.6Pro Rating: 2.5
A 3/5 death touch is a really frustrating body for your opponent to contend with, and you can get this down for 3 or 4 mana reasonably often.
Sidisi's Pet
AI Rating: 2.1Pro Rating: 2
This is a nice defensive creature thanks to the stat-line and lifelink, and morph can allow you to get some surprise life gain out of nowhere. It also happens to have 4 toughness, something several cards in the set key on.
Sultai Scavenger
AI Rating: 2.9Pro Rating: 3
This ends up being an efficient flyer fairly often in your typical Black decks in the format.
Swarm of Bloodflies
AI Rating: 2.4Pro Rating: 2
The start stat-line is absolutely horrendous, but it can gain enough counters to be a threat.
Throttle
AI Rating: 2.9Pro Rating: 2
It's not the most efficient removal in the world, but it answers most creatures in the format at Instant speed.
Unyielding Krumar
AI Rating: 1.7Pro Rating: 1.5
This is awful if you can't give it Vigilance, and passable if you can.
Act of Treason
AI Rating: 1.9Pro Rating: 1.0 // 2.5
As usual, not really worth it unless you've got some sacrifice outlets to get rid of the creature you steal.
Ainok Tracker
AI Rating: 1.4Pro Rating: 2
While this is certainly inefficient, it is also incredibly punishing if your opponent chooses to block it with a creature with three or less toughness.
Arc Lightning
AI Rating: 4.6Pro Rating: 4
At worst, this is three mana to kill something with three toughness which is plenty good. At it's best, it can pick off three creatures. And that's without talking about the fact that it can hit your opponent too!
Arrow Storm
AI Rating: 2.7Pro Rating: 2.5
This is a Lava Axe that can actually hit creatures, which makes for a pretty solid card, even at five mana. It's a bit worse than the axe if you're not Raiding, but it is pretty doable to get that going in Red.
Ashcloud Phoenix
AI Rating: 4.8Pro Rating: 5
This is a hard-hitting flyer that doesn't stay dead and damages your opponent every time it turns face up. That's a text book bomb.
Barrage of Boulders
AI Rating: 0.8Pro Rating: 2.5
This is surprisingly solid card that you always want one of in Blue-Red and Red-Green decks, where you tend to have a ton of power on the board and casting this is very capable of ending the game. Both decks will usually get Ferocious going without trying very hard.
Bloodfire Expert
AI Rating: 2.1Pro Rating: 2.5
The base stats are rough, but it slots nicely into both Blue-Red and Red-Green. In the former because of Prowess, in the latter because it often has 4 power.
Bloodfire Mentor
AI Rating: 1Pro Rating: 1.5
If you need to make a game go long, you could do worse than this. The body blocks reasonably well and it can dig you deeper in your library to find your outs. It doesn't do any of it efficiently, though.
Bring Low
AI Rating: 2.7Pro Rating: 2
This is pretty rough when the creature doesn't have a counter. When it does it becomes premium removal, but you have to account for the times where it is a 4-mana deal 3, because those feel rough and that's what it does the most often.
Burn Away
AI Rating: 3.7Pro Rating: 3.5
A 5-mana deal 6 instant is pretty nice. It can kill almost anything and can produce blowouts sometimes. The fact this just nukes the whole graveyard can really matter against decks in the Sultai colors too.
Canyon Lurkers
AI Rating: 1.4Pro Rating: 1.5
This can get a big hit in out of nowhere, but the low toughness means that morphing this isn't going to feel like a great deal most of the time, because it always has two toughness.
Crater's Claws
AI Rating: 5Pro Rating: 5
Fireball is nuts in Limited. It's great removal and a great finisher, and this has huge Ferocious upside.
Dragon Grip
AI Rating: 2.7Pro Rating: 2.5
This can be quite the combat trick in a deck with lots of 4 power creatures, as it tends to take something down and then stick around and offer a very relevant buff. It also works nicely in Jeskai decks because of Prowess.
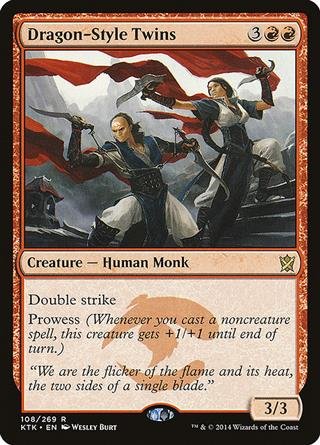
Dragon-Style Twins
AI Rating: -0Pro Rating: 4
The base stats can sometimes be really punishing. Your opponent can spend two mana to take this down and that's a huge tempo hit. However, the upside is worth it. A 5-mana 3/3 double striker is a reasonable deal to begin with, and with Prowess around your opponent is always going to wince when you attack with this thing. They have no idea what will happen.
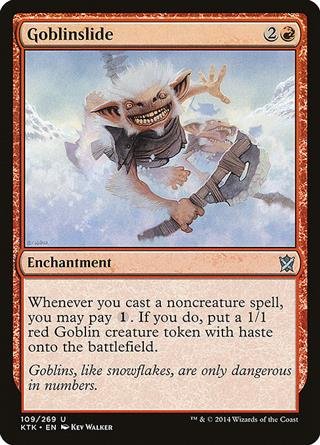
Goblinslide
AI Rating: 2.6Pro Rating: 1.0 // 3.5
This is a very powerful build around. Jeskai decks already want to run lots of spells, and tacking a Goblin on to those is huge. You can't really play it without a critical mass of spells, though.
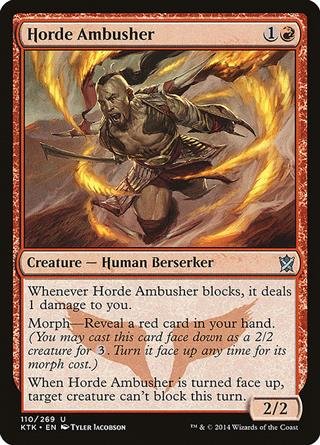
Horde Ambusher
AI Rating: 2.9Pro Rating: 2.5
This has a passable base line, and shutting down a blocker for a turn often allows for a huge turn for Red decks.
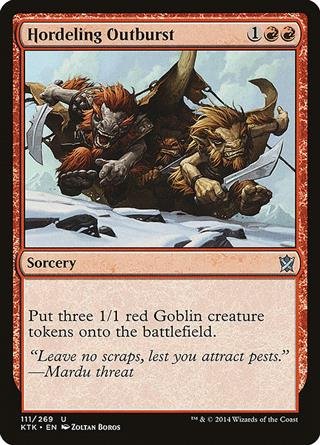
Hordeling Outburst
AI Rating: 3.8Pro Rating: 4
This is great in all the Red decks, whether you're interested in going wide or casting spells, it does it all, while also just being a great rate for adding three bodies to the board.
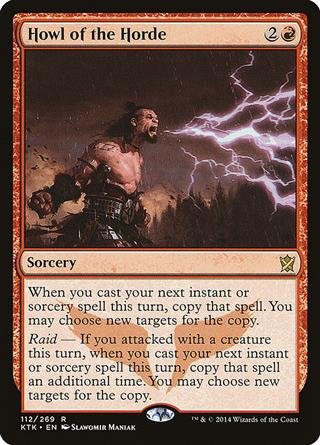
Howl of the Horde
AI Rating: 5Pro Rating: 1.5
As usual, spell copiers in Limited don't tend to work out very well. This one does have an impressive ceiling thanks to Raid, but it still takes too much work to get going.
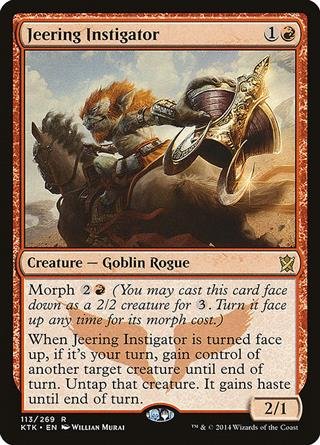
Jeering Instigator
AI Rating: 3.8Pro Rating: 3
Turning this face up and stealing something makes for a big turn, as it feels like you played a Haste creature with Threaten stapled to it, and that tends to be a powerful thing. You don't even need a sacrifice outlet to make this card work, because it actually adds to the board beyond the turn you get the effect.
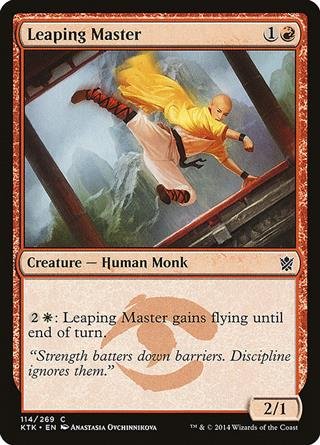
Leaping Master
AI Rating: 2.5Pro Rating: 2
This is a passable two drop. Giving it flying is expensive, but it does keep it relevant in most games.
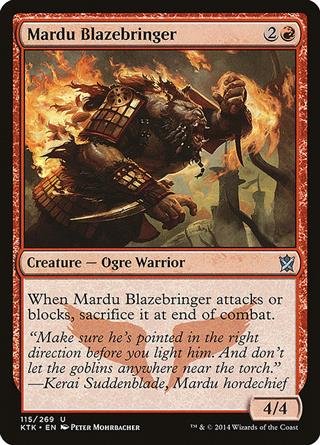
Mardu Blazebringer
AI Rating: -0Pro Rating: 1
The idea here is supposed to be that this gives you an early 4-power creature for Red-Green decks, but there are way better options for that around that aren't virtually dead cards.
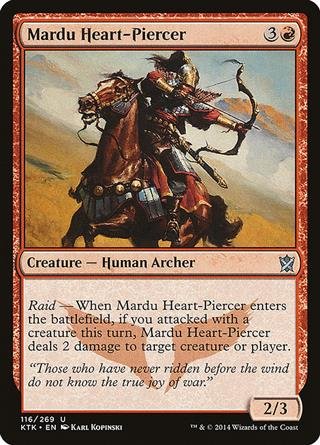
Mardu Heart-Piercer
AI Rating: 4.7Pro Rating: 3
If this was always a 4-mana 2/3 that did two damage on ETB, it would be a 4.0. Unfortunately, it's not always going to get it done, and when it can't it feels pretty bad. Still, you can get it going often enough for it to be a very powerful Common.
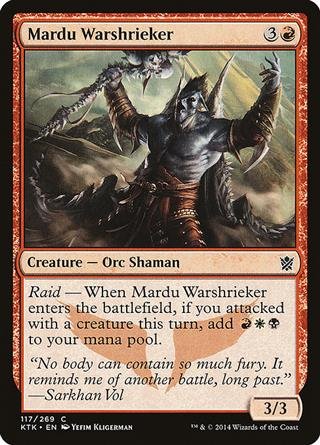
Mardu Warshrieker
AI Rating: 3.2Pro Rating: 3
This feels really nice when it lets you double spell, and pretty bad when you can't, since you just played a Hill Giant. Because of Morph, though, you're able to do something with the mana more often than in most formats.
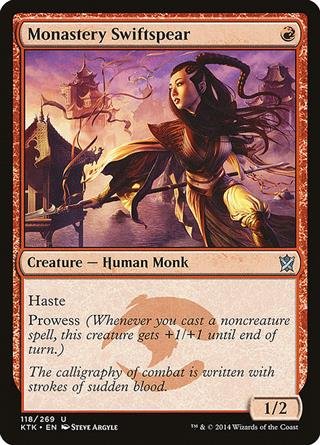
Monastery Swiftspear
AI Rating: 4Pro Rating: 3.5
While not quite as insane here as it is in 60-card formats, it is still a frightening turn one play in this format, and thanks to Prowess and lots of support for it in the set, it is a one drop that remains relevant all game long.
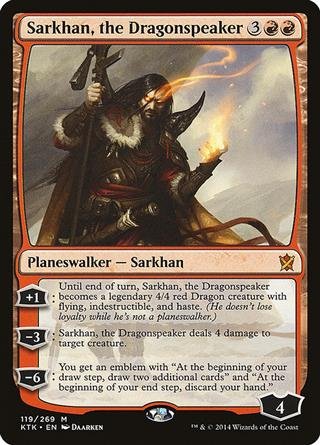
Sarkhan, the Dragonspeaker
AI Rating: 5Pro Rating: 5
You're usually going ot use the -3 up front so you can protect him and get something out of him right away -- then, if your opponent can't take him down, you're swinging for 8 in the air on your next turn. That's not easy to beat, and the fail case is pretty darn good too.
Shatter
AI Rating: 1.2Pro Rating: 0.5
Not enough artifacts to main deck this.
Summit Prowler
AI Rating: 1.2Pro Rating: 2
This is surprisingly solid. This stat-line was better back in 2014 and it's a nice enabler for Ferocious.

Swift Kick
AI Rating: 2.1Pro Rating: 2.5
Your creature already needs high enough toughness for this to work effectively, otherwise you can get 2-for-1'd. But the power boost does mean a wider swath of creatures can use this effectively. It isn't quite premium though, too situational.
Tormenting Voice
AI Rating: 2.1Pro Rating: 2
This is nice in Prowess decks, and passable elsewhere.

Trumpet Blast
AI Rating: 1.7Pro Rating: 1.0 // 2.5
Some Mardu decks can go really wide, and having one of these in that type of deck is a good idea.

Valley Dasher
AI Rating: 2.1Pro Rating: 1.5
A two mana 2/2 with Haste is nice, but one that keeps returning to yoru hand? Not so much.
War-Name Aspirant
AI Rating: 4.1Pro Rating: 3
A two mana 2/1 that can't be blocked by tokens is passable, and this will often be a 3/2.
Alpine Grizzly
AI Rating: 1.4Pro Rating: 2
This is a passable stat-line, and it gets an extra bump in a set with Ferocious.
Archers' Parapet
AI Rating: 2.8Pro Rating: 2.5
This is a good defensive creature that can even function as a win condition in slower decks.
Awaken the Bear
AI Rating: 3.1Pro Rating: 2
This is a little expensive for what it does, but it has enough upside that it's a trick that makes the cut reasonably often.
Become Immense
AI Rating: 2.8Pro Rating: 2.5
This stats boost is MASSIVE, and firing it off for one or two mana is very doable in Green. It does take set up, and the times when you can't get your graveyard stocked it feels pretty bad.
Dragonscale Boon
AI Rating: 1.8Pro Rating: 1.5
This is an incredibly weak boost for the cost, even if the tokens are permanent and your creature untaps.
Feed the Clan
AI Rating: 0.8Pro Rating: 0.5
If you're in a Sultai deck that wants to make the game go long, Feed the Clan can definitely be a sideboard option against really aggressive decks.
Hardened Scales
AI Rating: 4.6Pro Rating: 0
This is too difficult to build around. Sure, if you could get it on turn one every game and make sure your deck is filled with counters (like the Modern deck built around this Enchantment) it would be great, but things don't line up that conveniently.
Heir of the Wilds
AI Rating: 4.5Pro Rating: 3.5
A two mana 2/2 deathtouch is a nice starting point, and this often attacks as a 3/3.
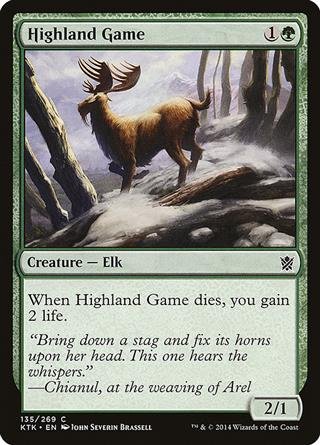
Highland Game
AI Rating: 2.3Pro Rating: 1.5
This is a very mediocre stat-line, and it has mediocre upside stapled to it.
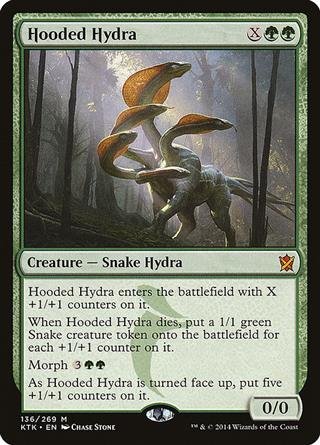
Hooded Hydra
AI Rating: 5Pro Rating: 5
If you get this early, you play it face down and flip it a few turns later. That way you get a 5/5 that gives you five 1/1s when it dies. Then, if you get it late, you can pump all your mana into it and play it face up. Both modes are excellent, and makes life very hard for your opponent.
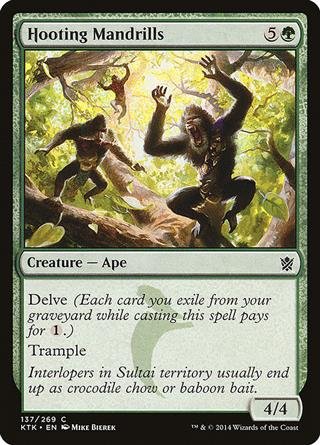
Hooting Mandrills
AI Rating: 2.5Pro Rating: 3
Like most Delve cards you can't run too many of them, but the first few are pretty powerful in Sultai decks. Casting this for one or two is a common occurrence.
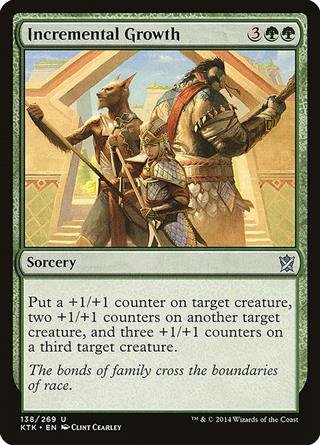
Incremental Growth
AI Rating: 2.5Pro Rating: 2
This offers quite the boost, but it's frustrating that you have to have three creatures to get full value. That's not hard, but there are times where you just can't do it, and that's rough. Not it doesn't say, 'up to' either.
Kin-Tree Warden
AI Rating: 1.4Pro Rating: 1.5
It's hard for any Morph creature to be unplayable, since they are all Gray Ogres with upside, but this one is very underwhelming.
Longshot Squad
AI Rating: 2.7Pro Rating: 2.5
I like this less than the other Outlast lords, since it offers a boost that is only useful on defense. Still, it's a creature that can affect the board right away, and it can grow itself when it's body isn't relevant enough.
Meandering Towershell
AI Rating: 4.3Pro Rating: 1.5
This is a horrible attacker for obvious reasons, but it is a massive creature that can clog up the ground, and it has high toughness in a color where that matters, so it does make the cut in the right deck.
Naturalize
AI Rating: 1.2Pro Rating: 0.5
Not enough targets for this. Bring it in out of the sideboard.
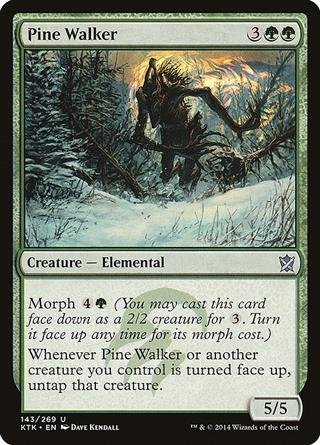
Pine Walker
AI Rating: 4.2Pro Rating: 4
A 5-mana 5/5 is no joke, and the Morph upside here is great, as it grants one-turn Vigilance to your Morphers -- including itself.
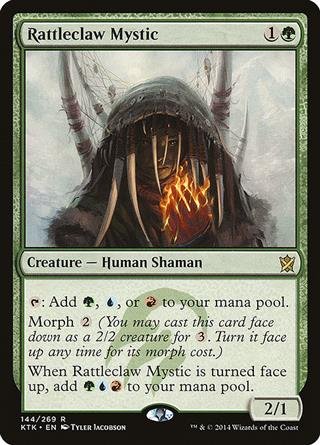
Rattleclaw Mystic
AI Rating: 4.7Pro Rating: 4
This offers some great ramp and fixing, and it even has some nice morph upside.

Roar of Challenge
AI Rating: 2.1Pro Rating: 1.5
As usual, Lure effects are bad in Limited. This one is a little bit better than most, because when you can line it up with Ferocious, it CAN be devastating. But you have to rely on your opponent's board and yours being in the right state.
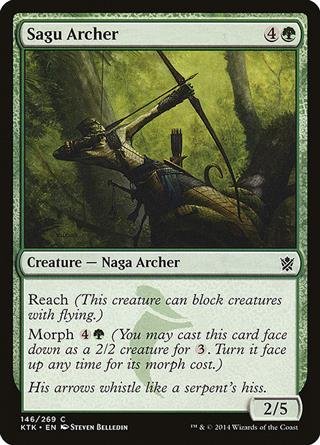
Sagu Archer
AI Rating: 1.9Pro Rating: 2
This can block most of the Flyers in this format, and sometimes it can do it out of nowhere.
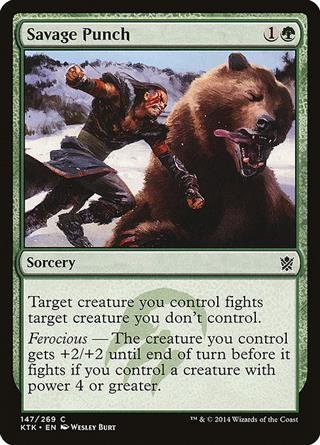
Savage Punch
AI Rating: 3.6Pro Rating: 4
When you have Ferocious online this feels truly absurd. It becomes a super efficient removal spell that also lets you crack in for extra damage. It lines up that way with regularity, too.
Scout the Borders
AI Rating: 0.6Pro Rating: 2
If you need to load your graveyard in Green -- and you often do -- this does the job.
See the Unwritten
AI Rating: 4.6Pro Rating: 2
A 4-mana draw can be quite powerful, even when you're just getting lands. This offers some serious fixing in a format where you're happy to have it, too.
Seek the Horizon
AI Rating: 0.9Pro Rating: 1
It's far too difficult to consistently spend six on this and actually get something that is worth that much mana on to the battlefield. It's truly horrendous when you don't have Ferocious online.
Smoke Teller
AI Rating: 1.7Pro Rating: 2
This has passable stats and the ability isn't entirely useless either, although you should only start using it once you have nothing else to do with your mana.

Sultai Flayer
AI Rating: 3.8Pro Rating: 3.5
At worst, this is a 4-mana 3/4 that gains you 4 life when it dies. That's a pretty nice creature that will always generate some real value, and this pays you off in a big way for having other 4 toughness creatures around.
Temur Charger
AI Rating: 2.7Pro Rating: 2.5
A two mana 3/1 is perfectly fine, and the trample upside doesn't hurt. Note it can target itself, that comes up sometimes.
Trail of Mystery
AI Rating: -0Pro Rating: 1.0 // 3.0
If you have a critical mass of Morph this can be pretty strong, fixing, drawing cards, and buffing your creatures. It isn't that easy to make that happen, though.
Tusked Colossodon
AI Rating: 1.2Pro Rating: 1.5
If you need a big top-curve creature well…you're hoping it isn't this. But running it isn't a disaster.
Tuskguard Captain
AI Rating: 3.7Pro Rating: 3.5
A great Outlast lord, like the others this can impact the board right away and even when it can't it's a creature that can very efficiently increase it's own size.
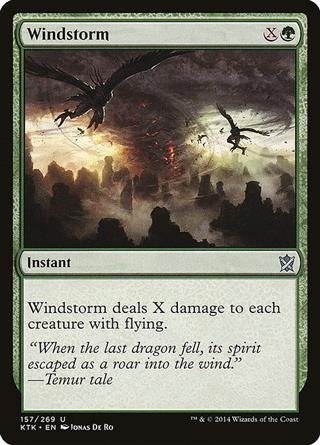
Windstorm
AI Rating: 2Pro Rating: 0.5
This should be in your sideboard, and it isn't like there are that many opponents going wide with flyers, so you won't bring it in often either.
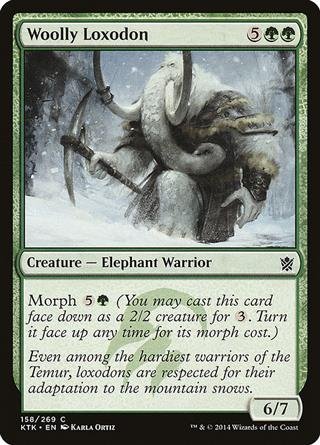
Woolly Loxodon
AI Rating: 3Pro Rating: 2.5
This massive Morpher can create all kinds of problems when you turn it sideways, either threatening to do a ton of damage out of nowhere, or completely annihilate anything that blocks it.
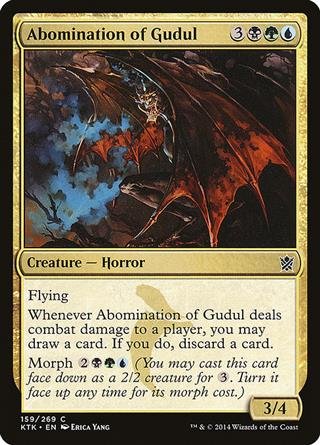
Abomination of Gudul
AI Rating: 2.1Pro Rating: 2.5
Playing this on turn three and flipping it turn five isn't too shabby. Even playing it face up for full price doesn't feel terrible. It offers a threatening flying body and some nice card selection.
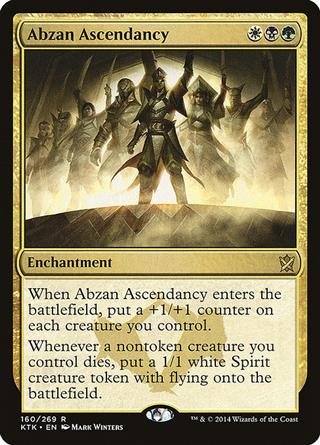
Abzan Ascendancy
AI Rating: 4.6Pro Rating: 4
Putting a counter on all your stuff can vary wildly from being amazing when you've gone really wide, to being quite bad if you have one or two creatures. But luckily this has another effect, and it helps balance things out. Getting a 1/1 flyer when your stuff dies is no small thing. If you're ahead, you can use them to go after your opponent. If you're behind, you can use them to stabilize.
Abzan Charm
AI Rating: 4.1Pro Rating: 4
This is either: a good removal spell, a decent combat trick, or a solid card draw spell. All three modes are good at the right time, so having those options is amazing.
Abzan Guide
AI Rating: 2.9Pro Rating: 3
Big lifelinkers can make life a real headache for your opponent, and this one can show up out of nowhere.

Anafenza, the Foremost
AI Rating: 4.6Pro Rating: 4.5
She's a little challenging to cast on curve, but that's okay, because she's good whenever you cast her. She offers those above rate stats, buffs your other stuff, and hates on the graveyard. Hard to ever feel like she's not doing a lot when you cast her.
Ankle Shanker
AI Rating: 3.9Pro Rating: 4
Well below-rate stats get this into trouble sometimes, and if you're not in a spot where you can attack, it feels miserable. But the good news is…this makes it so you're almost ALWAYS in a spot where you can attack, since blocking becomes a nightmare for your opponent.
Armament Corps
AI Rating: 4.2Pro Rating: 3.5
This can put a counter on itself, so it's often a 5-mana 5/5 that sticks a counter somewhere else, and that's a very nice card. Sometimes you can put a counter on two things that can already attack too.
Avalanche Tusker
AI Rating: -0Pro Rating: 2
This is fairly underwhelming. The stats aren't really worth the cost, and while it is a roundabout removal spell of sorts, there are way too many situations where things go really wrong.
Bear's Companion
AI Rating: 3.5Pro Rating: 4
5 mana for a 2/2 and a 4/4 is an excellent rate. Not much more to say about this one.
Butcher of the Horde
AI Rating: 5Pro Rating: 5
This can end the game in a hurry even without it's activated ability, but with it, the game can end even faster thanks to Haste! And, if you're a little behind, lifelink and/or Vigilance do a great job of allowing you to continue to pressure your opponent while protecting yourself.
Chief of the Edge
AI Rating: 4.2Pro Rating: 3
Black/White cares about Warriors, and you're going to have them without really trying, so the Chief has a real impact on the board the turn it comes down.

Chief of the Scale
AI Rating: 4Pro Rating: 3
A little worse than Chief of the Edge, but it still offers a real boost and an above-rate body.
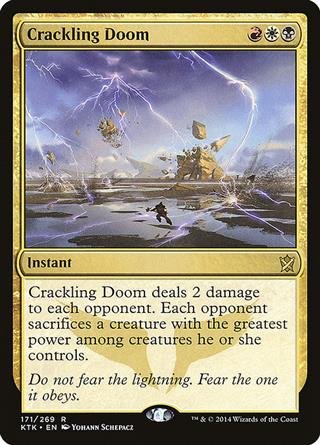
Crackling Doom
AI Rating: -0Pro Rating: 4
While you don't have complete control over what this kills, most of the time it will take down your opponent's best creature at instant speed, while Shocking them in the face. That's an amazing deal.
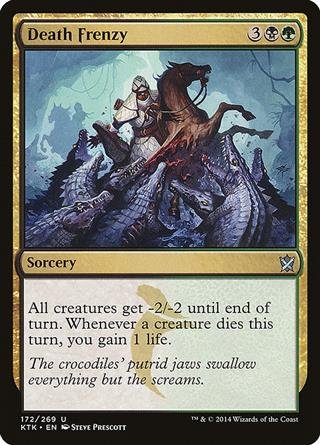
Death Frenzy
AI Rating: 3.3Pro Rating: 1.5
Black/Green is about high toughness, so the idea here is that your opponent will get hurt by this more than you do -- and this format DOES have lots of X/2s because of Morph. But…still, this is highly situational even in Black/Green decks.
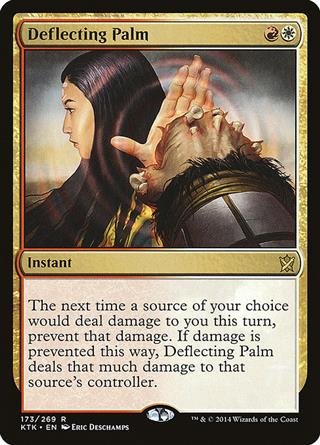
Deflecting Palm
AI Rating: 1.8Pro Rating: 0
This is way too situational. Only redirecting damage to your opponent just isn't what you want to be doing most of the time. It's the world's most conditional and random burn spell.
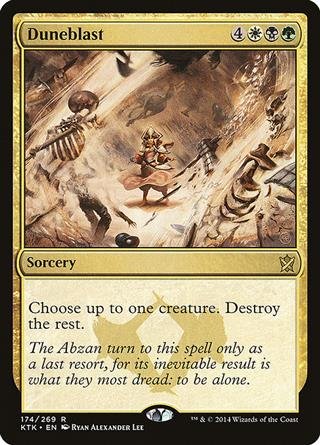
Duneblast
AI Rating: 4.8Pro Rating: 5
One of the biggest Limited bombs of all time. It's expensive, but you keep your best creature and destroy everything else. Your opponent basically never comes back from that.
Efreet Weaponmaster
AI Rating: 2.2Pro Rating: 3
The fact this has high power and first strike makes it hard for anything to block this, and it can reall wreck combat when it turns face up between it's own stat-line and the boost it can offer to something else.
Flying Crane Technique
AI Rating: 4.1Pro Rating: 2
Obviously, if you have a decent board, this can end the game for you. It isn't a complete 0 on defense either. But, it's expensive and requires you to already have a good board state, so it isn't worth a high pick either.

Highspire Mantis
AI Rating: 3.9Pro Rating: 2
A Flying, Trampling, Hill Giant isn't the best thing ever, but it's serviceable enough.
Icefeather Aven
AI Rating: 3.9Pro Rating: 4
This is a Flying Morph Man-O-War, and you can also just drop it on turn two if you need an efficient flyer. Either way, it feels pretty good when you use this card.
Ivorytusk Fortress
AI Rating: 3.9Pro Rating: 3.5
This offers some serious beef, and pseudo-vigilance for your +1/+1 counter creatures is nice, especially because it allows you to Outlast and then still have your creatures untapped on your opponents turn.
Jeskai Ascendancy
AI Rating: -0Pro Rating: 3.5
This basically gives Prowess to your whole board, while also digging you deeper in your deck and giving your creatures pseudo-vigilance. Prowess is very easy to trigger in this format, so it can be pretty great! It basically does nothing on its own, though.
Jeskai Charm
AI Rating: 4.1Pro Rating: 4
This is either a quality removal spell, a mediocre burn spell, or a situationally powerful mass pump effect. Sign me up.
Kheru Lich Lord
AI Rating: 3.6Pro Rating: 1
This card is really cool, but not very good. It's overcosted to play, and it's ability being random and requiring mana to use is rough. It also is kind of a nonbo alongside Delve, which is a much better way to abuse your graveyard anyway.

Kin-Tree Invocation
AI Rating: 3.8Pro Rating: 4
There are enough cheap high toughness creatures in the format that the Invocation ends up making a super efficient token with regularity. Getting a turn two 4/4 isn't unheard of, and it scales as the game goes on in most cases.

Mantis Rider
AI Rating: 5Pro Rating: 4
If you can consistently cast this on turn three, it is pretty awesome. While it does get less impressive later in the game, it's keyword abilities almost always mean it's relevant.
Mardu Ascendancy
AI Rating: 4.6Pro Rating: 2
Getting a 1/1 when you attack is nice, though certainly not incredible, and it's activated ability is incredibly underwhelming.
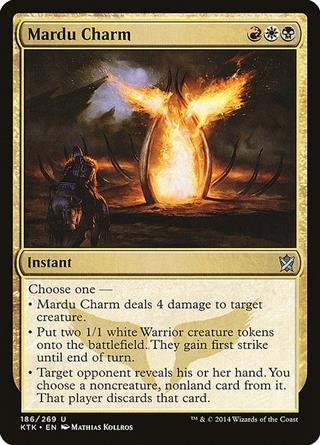
Mardu Charm
AI Rating: 4Pro Rating: 4
You're going to use the removal mode the most often, but generating two 1/1 first strike tokens is great too -- and can actually feel like removal that adds to the board in the right situation. The discard option isn't one you're going to want very often in Limited, though.
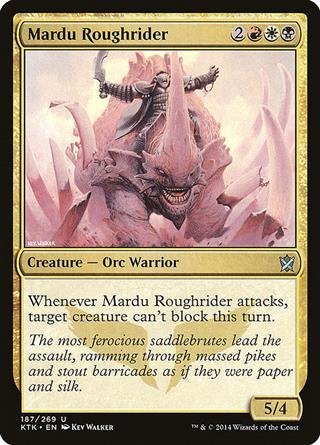
Mardu Roughrider
AI Rating: 3.2Pro Rating: 2.5
The stats are fine, and Mardu decks are very interested in getting the best blocker out of the way.

Master the Way
AI Rating: 3.1Pro Rating: 1.5
This has a really high ceiling, where you get an easy 2-for-1. But the floor is awful. If you're in a grindy Jeskai deck, it can be worth playing. Not so much otherwise.
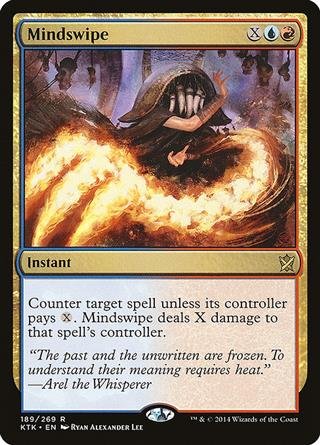
Mindswipe
AI Rating: 3.9Pro Rating: 3
Counterspell stapled to Fireball is pretty fun. It does scale all game long, while also having the ability to snipe an early spell. Like all counterspells, it's situational -- but the burn upside on the card does mean that even in situations where you can't quite counter something, you aren't entirely empty-handed.

Narset, Enlightened Master
AI Rating: 4.3Pro Rating: 4.5
In most Jeskai decks, Narset is insane. You already have lots of incentives for running a critical mass of non creature spells, and she pays you off for them in a massive way. Her First Strike and Hexproof make it so you're able to attack with her on a whole lot of board states, while also making her really silly if you enhance her stats.
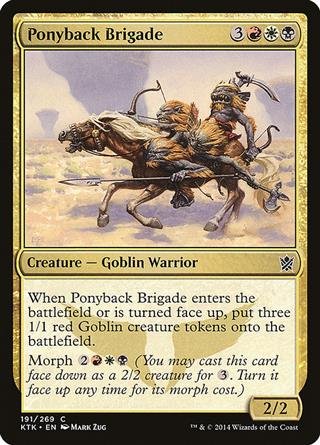
Ponyback Brigade
AI Rating: 3Pro Rating: 4
This is a very strong Common. Playing it face up feels pretty good. Turning it face up after playing it face down feels good too. Four bodies out of one card is just a really big deal.
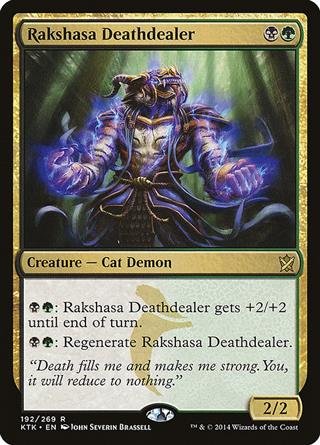
Rakshasa Deathdealer
AI Rating: 4.6Pro Rating: 3.5
This is fine on turn two, and stays relevant all game long thanks to its abilities. I will say that having the mana to use these abilities as many times as you want to doesn't line up quite as often as you might think.
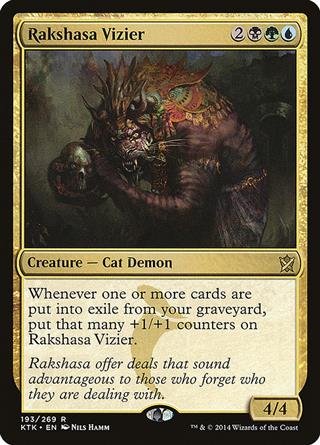
Rakshasa Vizier
AI Rating: -0Pro Rating: 3
The idea here is to combine it with Delve, and that's not especially difficult to do in Sultai. This does have a weak starting point, and it's still pretty much just a vanilla creature even when you go off.
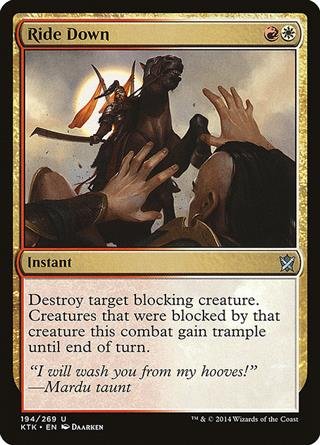
Ride Down
AI Rating: 4Pro Rating: 4
This is a beating if you're an aggro deck. Most of the time, removal spells that only kill blockers aren't great for aggro, since it means you're not doing damage. That's not the case here, though! Because it gives your creature trample, it's effectively like youre creature went unblocked and you kill their creature.
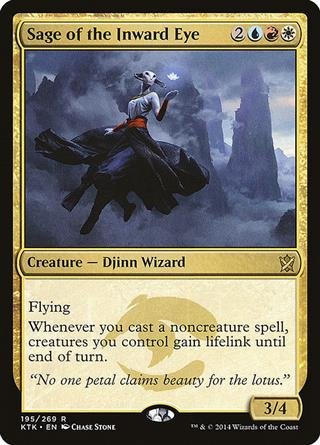
Sage of the Inward Eye
AI Rating: 4.8Pro Rating: 4
This has solid base stats, and giving your whole board lifelink with this isn't too difficult. You aren't always able to take advantage of lifelink, but the fact you have a 3/4 Flyer in play means that there's a very good chance you can.
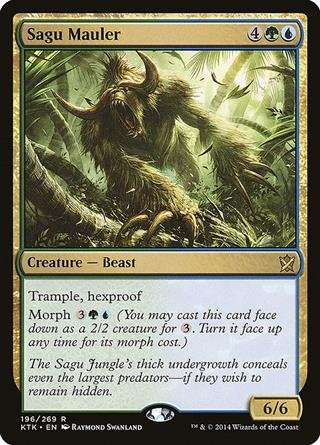
Sagu Mauler
AI Rating: 4.1Pro Rating: 4
This is good whichever way you play it. Sometimes it's best to wait until you can play it face up, since it won't have hexproof when it's face down, but either way you get an efficient, evasive, hard-to-kill creature.

Savage Knuckleblade
AI Rating: 4.6Pro Rating: 3.5
This offers nice stats, and its abilities virtually always make it relevant. Being able to activate more than one at a time is kind of wishful thinking, though.
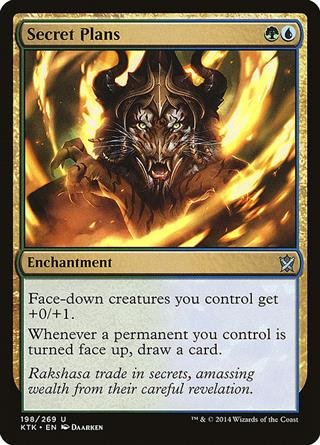
Secret Plans
AI Rating: 3.8Pro Rating: 1.5 // 4.0
This Morph buildaround is actually better than the Rare one! Making your morphs 2/3s actually matters, since it means they will outlcass opposing morphs, and drawing cards every time you turn something face up is a huge deal.
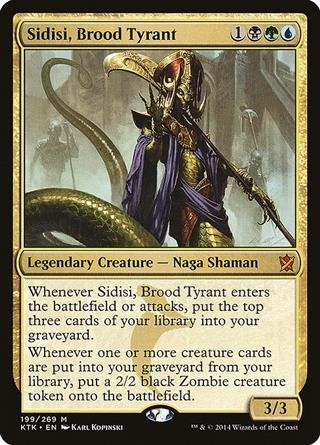
Sidisi, Brood Tyrant
AI Rating: 4.3Pro Rating: 5
You have to worry about milling yourself a little bit, but Sidisi loads your graveyard while adding very real bodies to the board, and that's exactly what every Sultai deck wants.
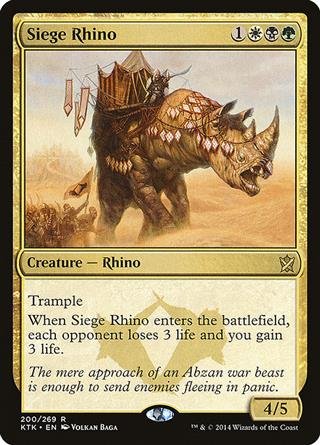
Siege Rhino
AI Rating: 4.8Pro Rating: 5
This offers nice evasive stats and a great ETB ability that can have a drastic impact on a race.
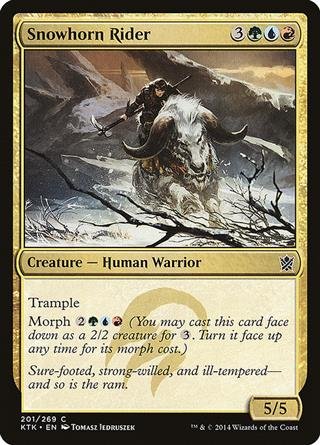
Snowhorn Rider
AI Rating: 2.8Pro Rating: 3
Like most Morphs with size, turning this face up can wreck combat or make your opponent take more damage than they expected out of nowhere.

Sorin, Solemn Visitor
AI Rating: 5Pro Rating: 5
The +1 is great if you're ahead, the -2 is good if you're behind -- and…that's where you get most of the value here. The ultimate is nice of course, but you're usually going to win before you get there.
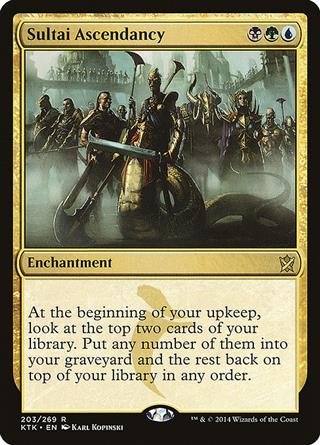
Sultai Ascendancy
AI Rating: 5Pro Rating: 1
This Ascendancy is a dud. Sure, you want to load your graveyard and get some card selection, but you don't want to spend a whole card on this effect.
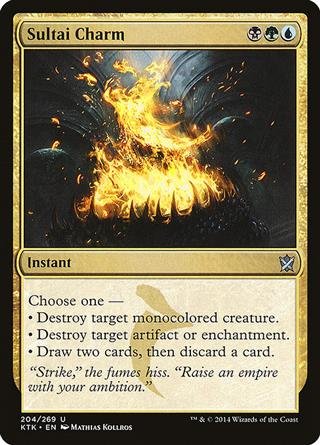
Sultai Charm
AI Rating: 3.5Pro Rating: 4
The removal mode is the one that's useful the most option, but having a way to deal with problem enchantments or dig deeper into your deck in a pinch is nice too.

Sultai Soothsayer
AI Rating: 3.2Pro Rating: 4
This adds a very relevant body to the board while generating a 2-for-1 that loads your graveyard. That's exactly what Sultai decks want to be doing in this format.
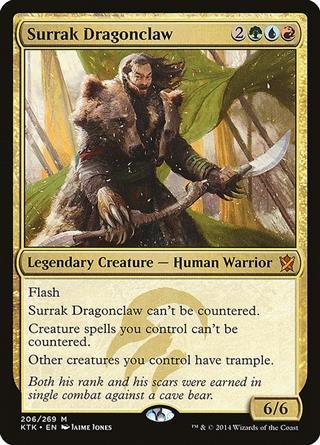
Surrak Dragonclaw
AI Rating: 5Pro Rating: 4.5
This usually flashes in and kills an attacker, before turning around and attacking hard on your turn -- while also making your other attacks better too.
Temur Ascendancy
AI Rating: 2.1Pro Rating: 2.5
Haste Enchantments are always underwhelming, as are Enchantments that draw you a card when a 4 power creature enters. This does both making it at least serviceable.
Temur Charm
AI Rating: 3.8Pro Rating: 4
The first two modes carry most of the weight here, as it can be an efficient fight spell or a counterspell. The third mode comes up rarely, but when it's good, it tends to be really good.
Trap Essence
AI Rating: 3.9Pro Rating: 2.5
Countering a creature and making one of yours better is a nice feeling. This is still situational and narrow enough that it isn't great, though.
Utter End
AI Rating: 3.9Pro Rating: 4
This answers anything very efficiently.
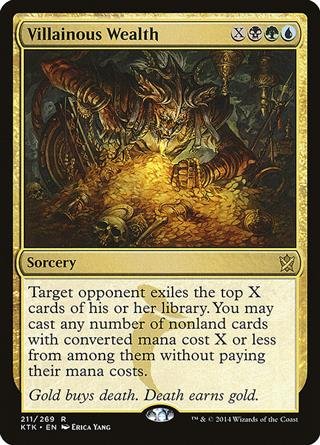
Villainous Wealth
AI Rating: -0Pro Rating: 2.5
This is a very real win condition, as if you can pump 5 or 6 mana into it, it's usually lights out for your opponent. It's pretty bad until you reach the late game, though.
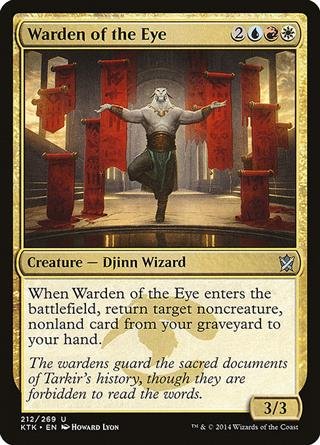
Warden of the Eye
AI Rating: 3.5Pro Rating: 2.5
The stats are rough, but it does generate a 2-for-1 most of the time.
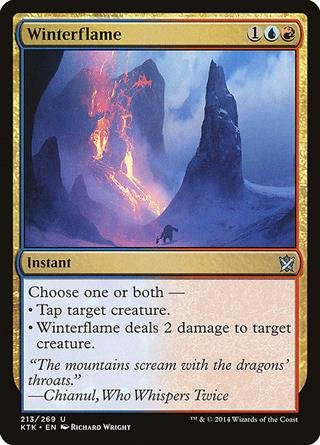
Winterflame
AI Rating: 4.3Pro Rating: 3
You're usually going to be choosing both, and tapping something and killing a small creature for three is a good deal.
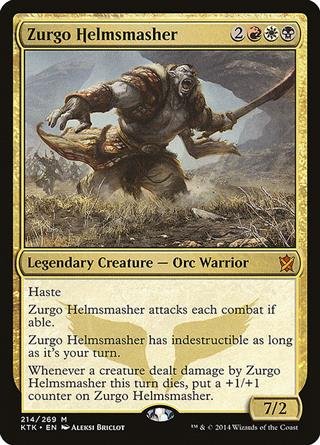
Zurgo Helmsmasher
AI Rating: 4.6Pro Rating: 3.5
He's an absolute menace on your turn, and pretty bad during your opponent's turn -- he dies to plenty of one mana removal.
Abzan Banner
AI Rating: 2.3Pro Rating: 1.5
These are really clunky, and even with the slower games this format has (compared to modern Limited), they aren't something you always run.
Altar of the Brood
AI Rating: 5Pro Rating: 0
Mill decks aren't a thing in this format, and you may actually be helping your opponent Delve if you do this.
Briber's Purse
AI Rating: 0.8Pro Rating: 1.5
This does trigger prowess, making it a little better than it looks at first. Shutting down a blocker or attacker for a turn has it's uses, but sometimes it isn't really worth a card.
Cranial Archive
AI Rating: 2.1Pro Rating: 1
This is mostly sideboard material for Sultai opponents. It does replace itself and trigger Prowess, though, so it isn't entirely terrible in your main deck.
Dragon Throne of Tarkir
AI Rating: -0Pro Rating: 1
Buffing your whole board sounds pretty sweet, but paying 4 to play, three to equip, and TWO for the activated ablity makes it far too slow to be worth using in most situations.
Ghostfire Blade
AI Rating: 5Pro Rating: 4
If this always equipped for three, it would be kind of alright -- but you can often equip it for one in this format thanks to the plethora of Morph creatures -- and that makes it a really good Equipment.
Heart-Piercer Bow
AI Rating: 1.2Pro Rating: 0
Picking off small creatures is just too narrow of a use.
Jeskai Banner
AI Rating: 1.3Pro Rating: 1.5
These are really clunky, and even with the slower games this format has (compared to modern Limited), they aren't something you always run.
Lens of Clarity
AI Rating: 0.7Pro Rating: 0
This is laughably bad. It isn't worth a card or one mana to get these effects.
Mardu Banner
AI Rating: 1.8Pro Rating: 1.5
These are really clunky, and even with the slower games this format has (compared to modern Limited), they aren't something you always run.
Sultai Banner
AI Rating: 1.3Pro Rating: 1.5
These are really clunky, and even with the slower games this format has (compared to modern Limited), they aren't something you always run.
Temur Banner
AI Rating: 1Pro Rating: 1.5
These are really clunky, and even with the slower games this format has (compared to modern Limited), they aren't something you always run.
Ugin's Nexus
AI Rating: 2.1Pro Rating: 0
There aren't enough ways to sacrifice Artifacts for this to ever do anything.
Witness of the Ages
AI Rating: 2.1Pro Rating: 1.5
This never feels efficient, but like most morph creatures in this format it isn't unplayable either.
Bloodfell Caves
AI Rating: 3Pro Rating: 3
Fixing is extra important in this wedge-focused set, so these gain lands are higher picks than they normally are.
Bloodstained Mire
AI Rating: 4.6Pro Rating: 3
Fixing is extra important in this wedge-focused set, so these fetch lands are higher picks than they normally are. Kind of nice they go in the graveyard for delve, too.
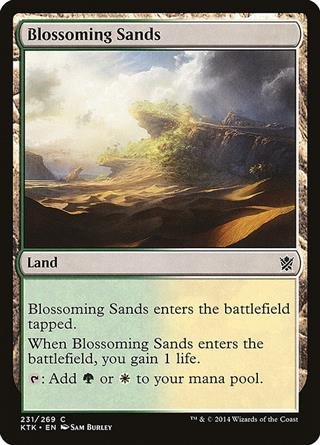
Blossoming Sands
AI Rating: 2.8Pro Rating: 3
Fixing is extra important in this wedge-focused set, so these gain lands are higher picks than they normally are.
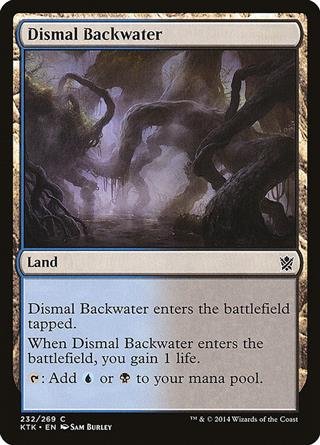
Dismal Backwater
AI Rating: 2.9Pro Rating: 3
Fixing is extra important in this wedge-focused set, so these gain lands are higher picks than they normally are.
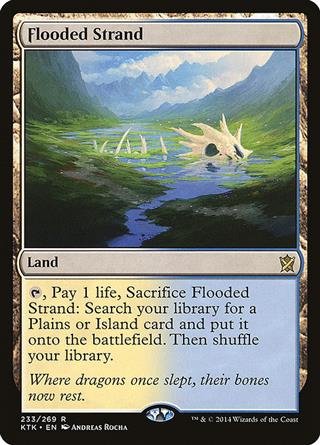
Flooded Strand
AI Rating: -0Pro Rating: 3
Fixing is extra important in this wedge-focused set, so these fetch lands are higher picks than they normally are.
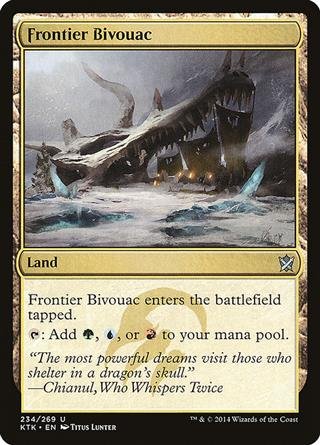
Frontier Bivouac
AI Rating: 3.8Pro Rating: 3.5
These tri-lands are fairly high picks, as you're going to find yourself running three colors in virtually every deck since doing so gives you access to powerhouses like the Charms. These make that much easier on your mana base.
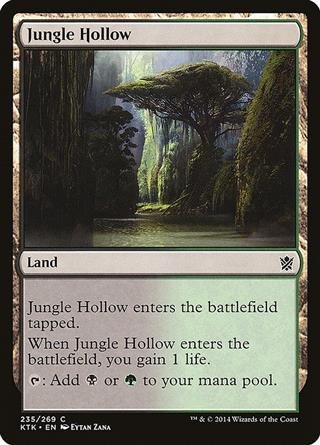
Jungle Hollow
AI Rating: 3.4Pro Rating: 3
Fixing is extra important in this wedge-focused set, so these gain lands are higher picks than they normally are.
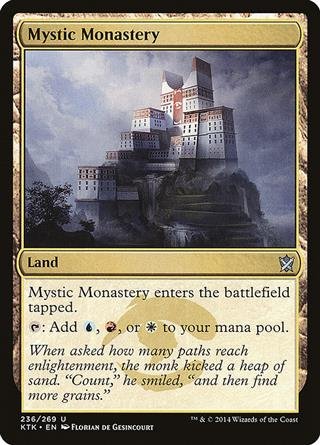
Mystic Monastery
AI Rating: 4.2Pro Rating: 3.5
These tri-lands are fairly high picks, as you're going to find yourself running three colors in virtually every deck since doing so gives you access to powerhouses like the Charms. These make that much easier on your mana base.

Nomad Outpost
AI Rating: 4.5Pro Rating: 3.5
These tri-lands are fairly high picks, as you're going to find yourself running three colors in virtually every deck since doing so gives you access to powerhouses like the Charms. These make that much easier on your mana base.

Opulent Palace
AI Rating: 3.7Pro Rating: 3.5
These tri-lands are fairly high picks, as you're going to find yourself running three colors in virtually every deck since doing so gives you access to powerhouses like the Charms. These make that much easier on your mana base.
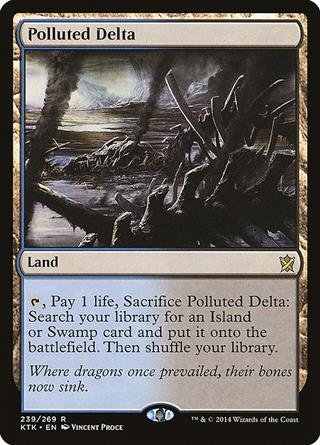
Polluted Delta
AI Rating: 4.6Pro Rating: 3
Fixing is extra important in this wedge-focused set, so these fetch lands are higher picks than they normally are.
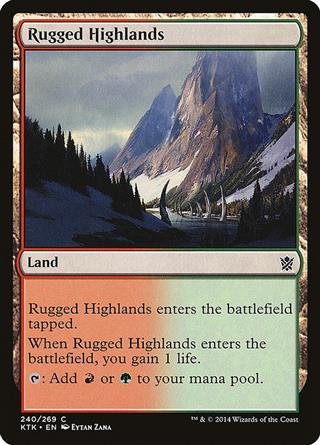
Rugged Highlands
AI Rating: 2.6Pro Rating: 3
Fixing is extra important in this wedge-focused set, so these gain lands are higher picks than they normally are.
Sandsteppe Citadel
AI Rating: 4.8Pro Rating: 3.5
These tri-lands are fairly high picks, as you're going to find yourself running three colors in virtually every deck since doing so gives you access to powerhouses like the Charms. These make that much easier on your mana base.
Scoured Barrens
AI Rating: 3.3Pro Rating: 3
Fixing is extra important in this wedge-focused set, so these gain lands are higher picks than they normally are.
Swiftwater Cliffs
AI Rating: 3.4Pro Rating: 3
Fixing is extra important in this wedge-focused set, so these gain lands are higher picks than they normally are.
Thornwood Falls
AI Rating: 3Pro Rating: 3
Fixing is extra important in this wedge-focused set, so these gain lands are higher picks than they normally are.
Tomb of the Spirit Dragon
AI Rating: 1Pro Rating: 0
Gaining a bit of life off of your morph creatures isn't worth diluting your mana base, especially in a format where you really want to have good mana for three-color decks.
Tranquil Cove
AI Rating: 2.8Pro Rating: 3
Fixing is extra important in this wedge-focused set, so these gain lands are higher picks than they normally are.
Wind-Scarred Crag
AI Rating: 3.6Pro Rating: 3
Fixing is extra important in this wedge-focused set, so these gain lands are higher picks than they normally are.
Windswept Heath
AI Rating: 3.8Pro Rating: 3
Fixing is extra important in this wedge-focused set, so these fetchlands are higher picks than they normally are.
Wooded Foothills
AI Rating: 3.2Pro Rating: 3
Fixing is extra important in this wedge-focused set, so these fetch lands are higher picks than they normally are.
Plains
AI Rating: -0Pro Rating:
Mountain
AI Rating: -0Pro Rating:
| Card | Pro Rating | AI Rating | APA | Picked | ALSA | Seen |
|---|---|---|---|---|---|---|
|
ss-uncommon|White|Creature — Human Cleric
|
3.5 | 4 | 3.76 | 50 | 3.36 | 115 |
|
ss-uncommon|White|Creature — Human Soldier
|
3.5 | 4.4 | 2.76 | 83 | 2.72 | 133 |
|
ss-common text-light|White|Creature — Hound Soldier
|
3 | 4.2 | 3.25 | 4 | 2.87 | 22 |
|
ss-common text-light|White|Creature — Kirin
|
2 | 2.6 | 7.67 | 6 | 5.89 | 44 |
|
ss-uncommon|White|Enchantment
|
0 | 1.1 | 12.00 | 2 | 8.21 | 32 |
|
ss-uncommon|White|Creature — Wall
|
1.5 | 1.8 | 10.00 | 2 | 6.88 | 27 |
|
ss-common text-light|White|Instant
|
1.0 // 2.5 | 1.9 | 9.78 | 9 | 7.29 | 59 |
|
ss-rare|White|Sorcery
|
4.5 | 5 | 1.00 | 1 | 1.00 | 2 |
|
ss-common text-light|White|Instant
|
0.5 | 0.8 | 12.67 | 9 | 9.26 | 91 |
|
ss-common text-light|White|Instant
|
3 | 3.8 | 4.43 | 7 | 3.44 | 24 |
|
ss-common text-light|White|Creature — Human Berserker
|
1 | 0.7 | 13.12 | 8 | 10.70 | 94 |
|
ss-rare|White|Creature — Human Soldier
|
4.5 | 5 | 1.00 | 2 | 1.00 | 2 |
|
ss-rare|White|Creature — Bird Soldier
|
4.5 | 5 | 1.00 | 3 | 1.00 | 3 |
|
ss-common text-light|White|Creature — Human Monk
|
2.5 | 2.4 | 8.20 | 10 | 7.95 | 56 |
|
ss-common text-light|White|Instant
|
2.5 | 3.9 | 4.00 | 7 | 4.12 | 32 |
|
ss-common text-light|White|Creature — Human Warrior
|
2.5 | 3.1 | 6.33 | 9 | 6.75 | 54 |
|
ss-common text-light|White|Creature — Human Warrior
|
3 | 4.2 | 3.33 | 6 | 3.36 | 25 |
|
ss-rare|White|Creature — Human Monk
|
3.5 | 5 | 1.00 | 1 | 1.00 | 1 |
|
ss-common text-light|White|Sorcery
|
1 | 2.9 | 7.00 | 6 | 7.50 | 57 |
|
ss-common text-light|White|Creature — Bird Warrior
|
1.5 | 2.1 | 9.14 | 7 | 8.21 | 66 |
|
ss-common text-light|White|Creature — Human Scout
|
2 | 1.9 | 9.75 | 8 | 9.12 | 82 |
|
ss-uncommon|White|Creature — Human Warrior
|
4 | 4.4 | 2.78 | 59 | 2.67 | 111 |
|
ss-common text-light|White|Enchantment — Aura
|
0 | 0.8 | 12.83 | 6 | 9.82 | 80 |
|
ss-common text-light|White|Instant
|
2 | 2.6 | 7.71 | 7 | 6.19 | 53 |
|
ss-uncommon|White|Enchantment
|
3.5 | 4.1 | 3.38 | 94 | 3.34 | 171 |
|
ss-uncommon|White|Instant
|
2 | 2.8 | 7.24 | 21 | 5.71 | 100 |
|
ss-uncommon|White|Creature — Human Warrior
|
2 | 4.1 | 3.50 | 8 | 3.06 | 62 |
|
ss-uncommon|White|Creature — Lammasu
|
1 | 0.4 | 14.00 | 1 | 6.62 | 24 |
|
ss-common text-light|White|Creature — Beast
|
1.5 | 1.1 | 12.00 | 5 | 8.71 | 59 |
|
ss-uncommon|White|Creature — Bird Soldier
|
3 | 4 | 3.68 | 22 | 2.97 | 71 |
|
ss-mythic|White|Creature — Bird
|
5 | 5 | 1.00 | 5 | 1.00 | 5 |
|
ss-uncommon|Blue|Instant
|
1.5 | 1.6 | 10.60 | 15 | 7.81 | 187 |
|
ss-common text-light|Blue|Instant
|
1.5 | 0.9 | 12.50 | 4 | 9.52 | 95 |
|
ss-mythic|Blue|Creature — Shapeshifter
|
3.5 | 5 | 1.00 | 1 | 1.00 | 2 |
|
ss-common text-light|Blue|Instant
|
2.5 | 2 | 9.36 | 11 | 7.84 | 55 |
|
ss-rare|Blue|Instant
|
3.5 | 4.6 | 2.25 | 4 | 2.75 | 6 |
|
ss-common text-light|Blue|Instant
|
0.5 | 1.5 | 10.75 | 4 | 7.28 | 49 |
|
ss-uncommon|Blue|Creature — Human Wizard
|
1.5 | 3 | 6.62 | 8 | 5.66 | 121 |
|
ss-common text-light|Blue|Creature — Elemental
|
2 | 3 | 6.60 | 5 | 7.05 | 42 |
|
ss-common text-light|Blue|Instant
|
2.5 | 3.2 | 6.00 | 5 | 6.47 | 37 |
|
ss-common text-light|Blue|Creature — Elemental
|
2 | 2.3 | 8.43 | 7 | 7.10 | 55 |
|
ss-rare|Blue|Instant
|
2.5 | 4.7 | 1.75 | 4 | 2.00 | 14 |
|
ss-uncommon|Blue|Creature — Human Monk
|
2.5 | 3.8 | 4.31 | 13 | 3.96 | 66 |
|
ss-common text-light|Blue|Creature — Bird Scout
|
3 | 3.3 | 5.75 | 12 | 6.22 | 47 |
|
ss-rare|Blue|Creature — Naga Wizard
|
3 | 5 | 1.00 | 1 | 1.00 | 1 |
|
ss-uncommon|Blue|Creature — Djinn Wizard
|
3 | 4.2 | 3.17 | 18 | 2.78 | 94 |
|
ss-common text-light|Blue|Creature — Bird
|
2 | 1.6 | 10.43 | 7 | 8.64 | 67 |
|
ss-common text-light|Blue|Creature — Human Monk
|
2.5 | 2.6 | 7.67 | 6 | 6.20 | 35 |
|
ss-mythic|Blue|Creature — Leviathan
|
5 | -0 | 15.00 | 0 | 1.00 | 1 |
|
ss-uncommon|Blue|Enchantment
|
0 | -0 | 15.00 | 0 | 6.67 | 24 |
|
ss-uncommon|Blue|Creature — Djinn Monk
|
2.5 | 3.8 | 4.25 | 8 | 3.70 | 70 |
|
ss-common text-light|Blue|Creature — Elemental
|
2 | 1.5 | 10.90 | 10 | 9.57 | 92 |
|
Scion of Glaciers
) 2 The ability to raise it's power makes it both a formidable attacker and blocker.
2 The ability to raise it's power makes it both a formidable attacker and blocker.
ss-uncommon|Blue|Creature — Elemental
|
2 | 3.6 | 5.00 | 2 | 6.07 | 28 |
|
ss-uncommon|Blue|Sorcery
|
3 | 2.7 | 7.33 | 3 | 6.67 | 31 |
|
ss-common text-light|Blue|Enchantment — Aura
|
2 | 1.5 | 10.67 | 6 | 8.23 | 68 |
|
ss-uncommon|Blue|Instant
|
0.5 | 1.4 | 11.00 | 2 | 7.08 | 23 |
|
ss-common text-light|Blue|Sorcery
|
0 | 0.4 | 13.75 | 4 | 9.96 | 80 |
|
ss-rare|Blue|Creature — Elemental
|
5 | 4.6 | 2.00 | 1 | 3.00 | 4 |
|
ss-common text-light|Blue|Sorcery
|
3.5 | 3.3 | 5.88 | 8 | 4.47 | 38 |
|
ss-uncommon|Blue|Instant
|
1 | 2.4 | 8.25 | 8 | 7.05 | 139 |
|
ss-common text-light|Blue|Instant
|
2 | 1.7 | 10.11 | 9 | 9.50 | 87 |
|
ss-common text-light|Blue|Creature — Elk
|
1.5 | 1 | 12.09 | 11 | 11.13 | 95 |
|
ss-common text-light|Blue|Creature — Djinn Monk
|
2.5 | 1.7 | 10.38 | 8 | 8.23 | 75 |
|
ss-uncommon|Black|Creature — Orc Warrior
|
2.5 | 3.8 | 4.26 | 43 | 3.72 | 180 |
|
ss-common text-light|Black|Sorcery
|
2 | 1.9 | 9.60 | 5 | 8.17 | 65 |
|
ss-rare|Black|Creature — Human Warrior
|
2 | 5 | 1.00 | 1 | 3.33 | 3 |
|
ss-uncommon|Black|Sorcery
|
2 | 3.7 | 4.64 | 11 | 4.11 | 89 |
|
ss-common text-light|Black|Enchantment — Aura
|
3 | 4 | 3.82 | 11 | 4.24 | 31 |
|
ss-uncommon|Black|Sorcery
|
1.5 | 1.7 | 10.10 | 10 | 6.27 | 154 |
|
ss-common text-light|Black|Creature — Spirit Warrior
|
2.5 | 2 | 9.50 | 2 | 5.00 | 40 |
|
ss-common text-light|Black|Sorcery
|
2 | 1.4 | 11.00 | 6 | 8.48 | 79 |
|
ss-mythic|Black|Instant
|
3 | 3.9 | 4.00 | 2 | 3.08 | 13 |
|
ss-rare|Black|Creature — Human Wizard
|
3 | 4.8 | 1.50 | 2 | 1.50 | 2 |
|
ss-uncommon|Black|Creature — Bat
|
2 | 3 | 6.60 | 10 | 4.22 | 76 |
|
ss-uncommon|Black|Creature — Vampire
|
2 | 2.6 | 7.75 | 12 | 4.86 | 104 |
|
ss-common text-light|Black|Creature — Zombie Crocodile
|
1 | 0.4 | 14.00 | 1 | 9.00 | 55 |
|
ss-common text-light|Black|Creature — Orc Warrior
|
1.5 | 1.9 | 9.75 | 4 | 8.57 | 71 |
|
ss-common text-light|Black|Creature — Human Warrior
|
3 | 3.8 | 4.30 | 10 | 4.20 | 42 |
|
ss-uncommon|Black|Creature — Orc Assassin
|
3.5 | 4 | 3.75 | 24 | 3.47 | 76 |
|
ss-common text-light|Black|Enchantment — Aura
|
1 | 1 | 12.09 | 11 | 10.50 | 82 |
|
ss-uncommon|Black|Instant
|
4 | 4.5 | 2.30 | 64 | 2.15 | 92 |
|
ss-rare|Black|Creature — Demon
|
3.5 | 5 | 1.00 | 1 | 1.00 | 1 |
|
ss-uncommon|Black|Enchantment
|
1.5 | 3.6 | 4.86 | 14 | 5.13 | 87 |
|
ss-common text-light|Black|Sorcery
|
1.5 | 2 | 9.50 | 8 | 6.82 | 58 |
|
ss-rare|Black|Enchantment
|
1.5 | -0 | 15.00 | 0 | 4.57 | 7 |
|
ss-common text-light|Black|Sorcery
|
2 | 1.8 | 10.00 | 2 | 7.04 | 66 |
|
ss-common text-light|Black|Creature — Zombie Elephant
|
1.5 | 1.2 | 11.67 | 3 | 9.52 | 71 |
|
ss-uncommon|Black|Creature — Human Assassin
|
3.5 | 4.1 | 3.50 | 24 | 2.93 | 72 |
|
ss-common text-light|Black|Creature — Zombie
|
2.5 | 1.6 | 10.56 | 9 | 9.26 | 75 |
|
ss-common text-light|Black|Creature — Zombie Ape
|
2 | 2.1 | 9.14 | 7 | 9.58 | 72 |
|
ss-common text-light|Black|Creature — Bird Warrior
|
3 | 2.9 | 6.89 | 9 | 5.80 | 46 |
|
ss-uncommon|Black|Creature — Insect
|
2 | 2.4 | 8.14 | 7 | 4.79 | 84 |
|
ss-common text-light|Black|Instant
|
2 | 2.9 | 6.75 | 4 | 5.48 | 43 |
|
ss-common text-light|Black|Creature — Orc Warrior
|
1.5 | 1.7 | 10.20 | 5 | 7.39 | 61 |
|
ss-common text-light|Red|Sorcery
|
1.0 // 2.5 | 1.9 | 9.80 | 5 | 9.05 | 73 |
|
ss-common text-light|Red|Creature — Hound Scout
|
2 | 1.4 | 11.00 | 4 | 8.68 | 57 |
|
ss-uncommon|Red|Sorcery
|
4 | 4.6 | 2.24 | 51 | 2.00 | 91 |
|
ss-common text-light|Red|Sorcery
|
2.5 | 2.7 | 7.57 | 7 | 5.78 | 44 |
|
ss-mythic|Red|Creature — Phoenix
|
5 | 4.8 | 1.67 | 9 | 1.67 | 9 |
|
ss-common text-light|Red|Sorcery
|
2.5 | 0.8 | 12.67 | 3 | 8.40 | 47 |
|
ss-common text-light|Red|Creature — Efreet Monk
|
2.5 | 2.1 | 9.20 | 5 | 7.91 | 66 |
|
ss-common text-light|Red|Creature — Efreet Shaman
|
1.5 | 1 | 12.14 | 7 | 9.91 | 89 |
|
ss-common text-light|Red|Instant
|
2 | 2.7 | 7.33 | 6 | 6.17 | 63 |
|
ss-uncommon|Red|Instant
|
3.5 | 3.7 | 4.59 | 17 | 3.53 | 66 |
|
ss-common text-light|Red|Creature — Human Rogue
|
1.5 | 1.4 | 11.00 | 5 | 8.18 | 66 |
|
ss-rare|Red|Sorcery
|
5 | 5 | 1.00 | 1 | 1.00 | 1 |
|
ss-uncommon|Red|Enchantment — Aura
|
2.5 | 2.7 | 7.33 | 12 | 6.04 | 114 |
|
ss-rare|Red|Creature — Human Monk
|
4 | -0 | 15.00 | 0 | 4.00 | 1 |
|
ss-uncommon|Red|Enchantment
|
1.0 // 3.5 | 2.6 | 7.81 | 16 | 6.01 | 124 |
|
ss-uncommon|Red|Creature — Human Berserker
|
2.5 | 2.9 | 6.79 | 19 | 5.00 | 97 |
|
ss-uncommon|Red|Sorcery
|
4 | 3.8 | 4.40 | 30 | 4.10 | 74 |
|
ss-rare|Red|Sorcery
|
1.5 | 5 | 1.00 | 1 | 5.00 | 4 |
|
ss-rare|Red|Creature — Goblin Rogue
|
3 | 3.8 | 4.50 | 2 | 3.33 | 3 |
|
ss-common text-light|Red|Creature — Human Monk
|
2 | 2.5 | 8.00 | 5 | 7.15 | 45 |
|
ss-uncommon|Red|Creature — Ogre Warrior
|
1 | -0 | 15.00 | 0 | 7.94 | 28 |
|
ss-uncommon|Red|Creature — Human Archer
|
3 | 4.7 | 1.83 | 23 | 1.96 | 68 |
|
ss-common text-light|Red|Creature — Orc Shaman
|
3 | 3.2 | 6.17 | 12 | 6.83 | 62 |
|
ss-uncommon|Red|Creature — Human Monk
|
3.5 | 4 | 3.89 | 46 | 3.96 | 145 |
|
ss-mythic|Red|Legendary Planeswalker — Sarkhan
|
5 | 5 | 1.00 | 1 | 1.00 | 1 |
|
ss-common text-light|Red|Instant
|
0.5 | 1.2 | 11.50 | 2 | 9.81 | 75 |
|
ss-common text-light|Red|Creature — Yeti
|
2 | 1.2 | 11.75 | 4 | 8.64 | 71 |
|
ss-common text-light|Red|Instant
|
2.5 | 2.1 | 9.22 | 9 | 9.09 | 78 |
|
ss-common text-light|Red|Sorcery
|
2 | 2.1 | 9.10 | 10 | 8.04 | 68 |
|
ss-common text-light|Red|Instant
|
1.0 // 2.5 | 1.7 | 10.38 | 8 | 8.90 | 73 |
|
ss-common text-light|Red|Creature — Human Berserker
|
1.5 | 2.1 | 9.25 | 4 | 6.41 | 52 |
|
ss-uncommon|Red|Creature — Human Warrior
|
3 | 4.1 | 3.50 | 18 | 3.62 | 62 |
|
ss-common text-light|Green|Creature — Bear
|
2 | 1.4 | 11.17 | 6 | 7.05 | 53 |
|
ss-common text-light|Green|Creature — Wall
|
2.5 | 2.8 | 7.27 | 11 | 7.10 | 56 |
|
ss-common text-light|Green|Instant
|
2 | 3.1 | 6.43 | 7 | 8.50 | 74 |
|
ss-uncommon|Green|Instant
|
2.5 | 2.8 | 7.16 | 25 | 5.68 | 109 |
|
ss-common text-light|Green|Instant
|
1.5 | 1.8 | 10.00 | 6 | 7.64 | 73 |
|
ss-common text-light|Green|Instant
|
0.5 | 0.8 | 12.80 | 10 | 11.50 | 104 |
|
ss-rare|Green|Enchantment
|
0 | 4.6 | 2.00 | 1 | 1.50 | 4 |
|
ss-uncommon|Green|Creature — Human Warrior
|
3.5 | 4.5 | 2.48 | 27 | 2.57 | 62 |
|
ss-common text-light|Green|Creature — Elk
|
1.5 | 2.3 | 8.70 | 10 | 8.61 | 63 |
|
ss-mythic|Green|Creature — Snake Hydra
|
5 | 5 | 1.00 | 1 | 1.00 | 2 |
|
ss-common text-light|Green|Creature — Ape
|
3 | 2.5 | 8.00 | 9 | 7.05 | 62 |
|
ss-uncommon|Green|Sorcery
|
2 | 2.5 | 8.08 | 12 | 5.22 | 74 |
|
ss-common text-light|Green|Creature — Human Warrior
|
1.5 | 1.4 | 11.00 | 8 | 9.91 | 87 |
|
ss-common text-light|Green|Creature — Hound Archer
|
2.5 | 2.7 | 7.40 | 5 | 5.94 | 33 |
|
ss-rare|Green|Creature — Turtle
|
1.5 | 4.3 | 3.00 | 1 | 3.17 | 7 |
|
ss-common text-light|Green|Instant
|
0.5 | 1.2 | 11.50 | 8 | 9.86 | 96 |
|
ss-uncommon|Green|Creature — Elemental
|
4 | 4.2 | 3.27 | 41 | 2.78 | 110 |
|
ss-rare|Green|Creature — Human Shaman
|
4 | 4.7 | 1.80 | 10 | 1.60 | 11 |
|
ss-uncommon|Green|Sorcery
|
1.5 | 2.1 | 9.00 | 5 | 7.13 | 31 |
|
ss-common text-light|Green|Creature — Naga Archer
|
2 | 1.9 | 9.57 | 7 | 8.57 | 63 |
|
ss-common text-light|Green|Sorcery
|
4 | 3.6 | 5.00 | 4 | 4.00 | 25 |
|
ss-common text-light|Green|Sorcery
|
2 | 0.6 | 13.20 | 5 | 9.67 | 76 |
|
ss-mythic|Green|Sorcery
|
2 | 4.6 | 2.00 | 3 | 2.56 | 9 |
|
ss-uncommon|Green|Sorcery
|
1 | 0.9 | 12.50 | 2 | 8.07 | 29 |
|
ss-common text-light|Green|Creature — Human Shaman
|
2 | 1.7 | 10.25 | 12 | 9.62 | 72 |
|
ss-uncommon|Green|Creature — Naga Shaman
|
3.5 | 3.8 | 4.44 | 27 | 4.50 | 83 |
|
ss-uncommon|Green|Creature — Horse
|
2.5 | 2.7 | 7.33 | 3 | 6.08 | 22 |
|
ss-rare|Green|Enchantment
|
1.0 // 3.0 | -0 | 15.00 | 0 | 2.00 | 1 |
|
ss-common text-light|Green|Creature — Beast
|
1.5 | 1.2 | 11.50 | 4 | 9.87 | 94 |
|
ss-uncommon|Green|Creature — Human Warrior
|
3.5 | 3.7 | 4.73 | 51 | 4.03 | 134 |
|
ss-uncommon|Green|Instant
|
0.5 | 2 | 9.50 | 2 | 8.67 | 27 |
|
ss-common text-light|Green|Creature — Elephant Warrior
|
2.5 | 3 | 6.58 | 12 | 6.20 | 59 |
|
ss-common text-light|Blue|Black|Green|Creature — Horror
|
2.5 | 2.1 | 9.20 | 5 | 7.09 | 66 |
|
ss-rare|White|Black|Green|Enchantment
|
4 | 4.6 | 2.00 | 1 | 2.00 | 1 |
|
ss-uncommon|White|Black|Green|Instant
|
4 | 4.1 | 3.54 | 26 | 2.96 | 65 |
|
ss-common text-light|White|Black|Green|Creature — Human Warrior
|
3 | 2.9 | 6.77 | 13 | 5.45 | 50 |
|
ss-mythic|White|Black|Green|Legendary Creature — Human Soldier
|
4.5 | 4.6 | 2.14 | 7 | 2.22 | 9 |
|
ss-rare|White|Black|Red|Creature — Goblin Berserker
|
4 | 3.9 | 4.00 | 1 | 4.00 | 2 |
|
ss-uncommon|White|Black|Green|Creature — Human Soldier
|
3.5 | 4.2 | 3.29 | 28 | 3.36 | 72 |
|
ss-rare|Blue|Red|Green|Creature — Elephant Warrior
|
2 | -0 | 15.00 | 0 | 3.20 | 6 |
|
ss-uncommon|Blue|Red|Green|Creature — Human Warrior
|
4 | 3.5 | 5.21 | 24 | 4.33 | 95 |
|
ss-rare|White|Black|Red|Creature — Demon
|
5 | 5 | 1.00 | 2 | 1.00 | 2 |
|
ss-uncommon|White|Black|Creature — Human Warrior
|
3 | 4.2 | 3.37 | 57 | 3.28 | 126 |
|
ss-uncommon|White|Black|Creature — Human Warrior
|
3 | 4 | 3.72 | 18 | 3.22 | 62 |
|
ss-rare|White|Black|Red|Instant
|
4 | -0 | 15.00 | 0 | 2.00 | 1 |
|
ss-uncommon|Black|Green|Sorcery
|
1.5 | 3.3 | 5.88 | 16 | 5.00 | 77 |
|
ss-rare|White|Red|Instant
|
0 | 1.8 | 10.00 | 1 | 4.25 | 5 |
|
ss-rare|White|Black|Green|Sorcery
|
5 | 4.8 | 1.50 | 2 | 1.50 | 2 |
|
ss-common text-light|White|Blue|Red|Creature — Efreet Monk
|
3 | 2.2 | 8.80 | 10 | 7.52 | 64 |
|
ss-rare|White|Blue|Red|Instant
|
2 | 4.1 | 3.50 | 2 | 2.75 | 4 |
|
ss-uncommon|White|Red|Creature — Insect
|
2 | 3.9 | 3.97 | 32 | 3.39 | 140 |
|
ss-uncommon|Blue|Green|Creature — Bird Shaman
|
4 | 3.9 | 4.00 | 29 | 3.43 | 62 |
|
ss-rare|White|Black|Green|Creature — Elephant
|
3.5 | 3.9 | 4.00 | 4 | 3.40 | 6 |
|
ss-rare|White|Blue|Red|Enchantment
|
3.5 | -0 | 15.00 | 0 | 3.00 | 2 |
|
ss-uncommon|White|Blue|Red|Instant
|
4 | 4.1 | 3.42 | 19 | 3.34 | 66 |
|
ss-rare|Blue|Black|Green|Creature — Zombie Wizard
|
1 | 3.6 | 5.00 | 1 | 5.00 | 5 |
|
ss-uncommon|Black|Green|Sorcery
|
4 | 3.8 | 4.23 | 31 | 3.90 | 96 |
|
ss-rare|White|Blue|Red|Creature — Human Monk
|
4 | 5 | 1.00 | 1 | 2.00 | 4 |
|
ss-rare|White|Black|Red|Enchantment
|
2 | 4.6 | 2.00 | 1 | 1.40 | 5 |
|
ss-uncommon|White|Black|Red|Instant
|
4 | 4 | 3.76 | 25 | 3.64 | 77 |
|
ss-uncommon|White|Black|Red|Creature — Orc Warrior
|
2.5 | 3.2 | 5.93 | 14 | 4.45 | 78 |
|
ss-uncommon|Blue|Red|Sorcery
|
1.5 | 3.1 | 6.43 | 7 | 4.21 | 70 |
|
ss-rare|Blue|Red|Instant
|
3 | 3.9 | 4.00 | 1 | 4.75 | 5 |
|
ss-mythic|White|Blue|Red|Legendary Creature — Human Monk
|
4.5 | 4.3 | 3.00 | 1 | 3.00 | 4 |
|
ss-common text-light|White|Black|Red|Creature — Goblin Warrior
|
4 | 3 | 6.60 | 15 | 5.17 | 65 |
|
ss-rare|Black|Green|Creature — Cat Demon
|
3.5 | 4.6 | 2.00 | 1 | 2.00 | 2 |
|
ss-rare|Blue|Black|Green|Creature — Cat Demon
|
3 | -0 | 15.00 | 0 | 4.25 | 5 |
|
ss-uncommon|White|Red|Instant
|
4 | 4 | 3.86 | 35 | 3.50 | 79 |
|
ss-rare|White|Blue|Red|Creature — Djinn Wizard
|
4 | 4.8 | 1.67 | 3 | 4.14 | 8 |
|
ss-rare|Blue|Green|Creature — Beast
|
4 | 4.1 | 3.50 | 2 | 3.50 | 2 |
|
ss-rare|Blue|Red|Green|Creature — Ogre Warrior
|
3.5 | 4.6 | 2.00 | 3 | 2.00 | 7 |
|
ss-uncommon|Blue|Green|Enchantment
|
1.5 // 4.0 | 3.8 | 4.29 | 14 | 4.85 | 87 |
|
ss-mythic|Blue|Black|Green|Legendary Creature — Naga Shaman
|
5 | 4.3 | 2.83 | 6 | 2.50 | 8 |
|
ss-rare|White|Black|Green|Creature — Rhino
|
5 | 4.8 | 1.50 | 2 | 1.50 | 2 |
|
ss-common text-light|Blue|Red|Green|Creature — Human Warrior
|
3 | 2.8 | 7.12 | 8 | 7.05 | 48 |
|
ss-mythic|White|Black|Legendary Planeswalker — Sorin
|
5 | 5 | 1.00 | 1 | 1.00 | 1 |
|
ss-rare|Blue|Black|Green|Enchantment
|
1 | 5 | 1.00 | 1 | 5.75 | 12 |
|
ss-uncommon|Blue|Black|Green|Instant
|
4 | 3.5 | 5.08 | 25 | 4.73 | 105 |
|
ss-uncommon|Blue|Black|Green|Creature — Naga Shaman
|
4 | 3.2 | 6.09 | 23 | 5.08 | 86 |
|
ss-mythic|Blue|Red|Green|Legendary Creature — Human Warrior
|
4.5 | 5 | 1.00 | 1 | 1.00 | 1 |
|
ss-rare|Blue|Red|Green|Enchantment
|
2.5 | 2.1 | 9.00 | 1 | 7.25 | 6 |
|
ss-uncommon|Blue|Red|Green|Instant
|
4 | 3.8 | 4.29 | 7 | 4.46 | 22 |
|
ss-rare|Blue|Red|Green|Instant
|
2.5 | 3.9 | 4.00 | 1 | 8.50 | 4 |
|
ss-rare|White|Black|Instant
|
4 | 3.9 | 4.00 | 1 | 4.00 | 1 |
|
ss-rare|Blue|Black|Green|Sorcery
|
2.5 | -0 | 15.00 | 0 | 3.75 | 5 |
|
ss-uncommon|White|Blue|Red|Creature — Djinn Wizard
|
2.5 | 3.5 | 5.32 | 19 | 4.75 | 88 |
|
ss-uncommon|Blue|Red|Instant
|
3 | 4.3 | 2.85 | 13 | 3.16 | 74 |
|
ss-mythic|White|Black|Red|Legendary Creature — Orc Warrior
|
3.5 | 4.6 | 2.00 | 4 | 2.00 | 4 |
|
ss-common text-light||Artifact
|
1.5 | 2.3 | 8.50 | 4 | 7.00 | 57 |
|
ss-rare||Artifact
|
0 | 5 | 1.00 | 1 | 4.80 | 6 |
|
ss-uncommon||Artifact
|
1.5 | 0.8 | 12.67 | 3 | 7.31 | 24 |
|
ss-uncommon||Artifact
|
1 | 2.1 | 9.00 | 2 | 7.31 | 22 |
|
ss-rare||Legendary Artifact — Equipment
|
1 | -0 | 15.00 | 0 | 5.33 | 8 |
|
ss-rare||Artifact — Equipment
|
4 | 5 | 1.00 | 1 | 1.00 | 1 |
|
ss-uncommon||Artifact — Equipment
|
0 | 1.2 | 11.50 | 2 | 6.50 | 25 |
|
ss-common text-light||Artifact
|
1.5 | 1.3 | 11.43 | 7 | 10.21 | 76 |
|
ss-common text-light||Artifact
|
0 | 0.7 | 13.00 | 1 | 11.25 | 82 |
|
ss-common text-light||Artifact
|
1.5 | 1.8 | 9.83 | 6 | 9.63 | 70 |
|
ss-common text-light||Artifact
|
1.5 | 1.3 | 11.40 | 5 | 9.52 | 66 |
|
ss-common text-light||Artifact
|
1.5 | 1 | 12.22 | 9 | 10.09 | 74 |
|
ss-mythic||Legendary Artifact
|
0 | 2.1 | 9.00 | 1 | 5.33 | 4 |
|
ss-uncommon||Artifact Creature — Golem
|
1.5 | 2.1 | 9.16 | 19 | 7.89 | 177 |
|
ss-common text-light||Land
|
3 | 3 | 6.67 | 9 | 6.05 | 56 |
|
ss-rare||Land
|
3 | 4.6 | 2.00 | 2 | 2.00 | 2 |
|
ss-common text-light||Land
|
3 | 2.8 | 7.20 | 10 | 6.32 | 44 |
|
ss-common text-light||Land
|
3 | 2.9 | 7.00 | 5 | 6.00 | 46 |
|
ss-rare||Land
|
3 | -0 | 15.00 | 0 | 4.00 | 2 |
|
ss-uncommon||Land
|
3.5 | 3.8 | 4.30 | 23 | 3.06 | 72 |
|
ss-common text-light||Land
|
3 | 3.4 | 5.60 | 5 | 5.44 | 38 |
|
ss-uncommon||Land
|
3.5 | 4.2 | 3.10 | 10 | 3.25 | 18 |
|
ss-uncommon||Land
|
3.5 | 4.5 | 2.44 | 18 | 1.94 | 65 |
|
ss-uncommon||Land
|
3.5 | 3.7 | 4.70 | 20 | 3.44 | 63 |
|
ss-rare||Land
|
3 | 4.6 | 2.00 | 1 | 2.25 | 4 |
|
ss-common text-light||Land
|
3 | 2.6 | 7.75 | 12 | 7.55 | 65 |
|
ss-uncommon||Land
|
3.5 | 4.8 | 1.59 | 22 | 1.82 | 71 |
|
ss-common text-light||Land
|
3 | 3.3 | 5.67 | 6 | 4.39 | 33 |
|
ss-common text-light||Land
|
3 | 3.4 | 5.50 | 10 | 6.42 | 43 |
|
ss-common text-light||Land
|
3 | 3 | 6.50 | 10 | 5.40 | 36 |
|
ss-uncommon||Land
|
0 | 1 | 12.33 | 3 | 10.29 | 32 |
|
ss-common text-light||Land
|
3 | 2.8 | 7.25 | 8 | 6.05 | 57 |
|
ss-common text-light||Land
|
3 | 3.6 | 5.00 | 7 | 5.47 | 28 |
|
ss-rare||Land
|
3 | 3.8 | 4.50 | 2 | 6.20 | 5 |
|
ss-rare||Land
|
3 | 3.2 | 6.00 | 1 | 3.50 | 2 |
|
ss-common text-light||Basic Land — Plains
|
-0 | 15.00 | 0 | 13.00 | 2 | |
|
ss-common text-light||Basic Land — Mountain
|
-0 | 15.00 | 0 | 3.00 | 1 |
)
)
)
)
)
)
)
)
)
)
)
)
)
)
)
)
)
)
)
)
)
)
)
)
)
)
)
)
)
)
)
)
)
)
)
)
)
)
)
)
)
)
)
)
)
)
)
)
)
)
)
)
)
)
)
)
)
)
)
)
)
)
)
)
)
)
)
)
)
)
)
)
)
)
)
)
)
)
)
)
)
)
)
)
)
)
)
)
)
)
)
)
)
)
)
)
)
)
)
)
)
)
)
)
)
)
)
)
)
)
)
)
)
)
)
)
)
)
)
)
)
)
)
)
)
)
)
)
)
)
 it would be great, but things don't line up that conveniently.'))
)
)
)
)
)
)
)
)
)
)
)
)
)
)
)
)
)
)
)
)
)
)
)
)
)
)
)
)
)
)
)
)
)
)
)
)
)
)
)
)
)
)
)
)
)
)
)
)
)
)
)
)
)
)
)
)
)
)
)
)
)
)
)
)
)
)
)
)
)
)
)
)
)
)
)
)
)
)
)
)
)
, they aren't something you always run.'))
)
)
)
)
)
)
, they aren't something you always run.'))
)
, they aren't something you always run.'))
, they aren't something you always run.'))
, they aren't something you always run.'))
)
)
)
)
)
)
)
)
)
)
)
)
)
)
)
)
)
)
)
)
)
)
)
)
)
About Limited Ratings
- 5.0 The absolute best you can get.
- 4.5 Incredible bomb, but not unbeatable.
- 4.0 Good rare or top-tier uncommon.
- 3.5 Top-tier common or solid uncommon.
- 3.0 Good playable that always make the cut.
- 2.5 A solid playable that rarely gets cut.
- 2.0 A good playable, but is sometimes cut.
- 1.5 Filler card but sometimes gets cut.
- 1.0 Not good filler and often gets gut.
- 0.5 Almost Unplayable and mostly sideboard material.
- 0.0 Not playable at all.
AI Limited ratings are gathered with data from MTGA Assistant, while Nizzahon Magic provides the Pro ratings. The key difference is that the Pro ratings and comments are made before the set officially releases, while the AI ratings dynamically update with new data. It would be best to use the Pro ratings as guidance as sets are released and the AI Ratings a couple of weeks after release. Here is an explanation of how we score the cards: